
SwanLab SSO Feature Overview
This document describes the SSO capabilities, applicable scenarios, account policy, and user login flow in the current SwanLab version. The current version supports OAuth2, OIDC, and SAML2.
Commercial Only
SSO (Single Sign-On) is only supported in the SwanLab commercial edition. The community edition does not include this feature.
1. Feature Introduction
SSO (Single Sign-On) allows users to log in to SwanLab with an existing enterprise identity provider (IdP) account. After an administrator configures and enables a Provider in SwanLab, the corresponding SSO login entry appears on the login page. When users click the entry, they are redirected to the enterprise IdP to complete authentication, and then return to SwanLab to log in, bind an account, or automatically create an account.
2. Supported Scope
| Protocol | Currently supported capabilities | Applicable scenarios |
|---|---|---|
| OAuth2 | Authorization Code, Access Token, Userinfo, field mapping | General OAuth2 identity sources and enterprise OAuth2 services |
| OIDC | Discovery, Authorization Code, ID Token validation, nonce validation, claims mapping | Standard OIDC services such as Keycloak, Okta, Authing, and Azure AD |
| SAML2 | SP-initiated login, signed AuthnRequest, ACS, SP Metadata, AudienceRestriction validation | Enterprise SAML IdPs, ADFS, Keycloak SAML, Authentik, Okta SAML |
Current limitation:
- SAML2 only supports SP-initiated login. Login initiated directly from the IdP portal is not supported.
3. Self-hosted Account Policy
In self-hosted environments, accounts are handled as follows after SSO login:
| Scenario | Handling method |
|---|---|
| Third-party identity already bound | Log in to SwanLab directly after authentication succeeds |
| OAuth2 identity not bound | The user binds an existing SwanLab account with its username and password before logging in |
| OIDC identity not bound | SwanLab automatically creates and binds an account |
| SAML2 identity not bound | SwanLab automatically creates and binds an account |
3.1 Automatic Account Creation
When a user logs in through OIDC or SAML2 for the first time and the third-party identity is not bound, SwanLab automatically creates an account:
- SwanLab first uses the username returned by the IdP and extracted through field mapping.
- If the username is valid and available, the page silently creates the account and logs in.
- If the username is empty, invalid, or already taken, the page asks the user to manually change the username.
- After the account is created successfully, the third-party identity is automatically bound to the new account.
Username rules:
Length: 1 to 25 characters
Characters: letters, digits, underscores, and hyphens
Automatic account creation also checks the user seats in the self-hosted license. If there are not enough seats, account creation fails, and an administrator must release or add user seats first.
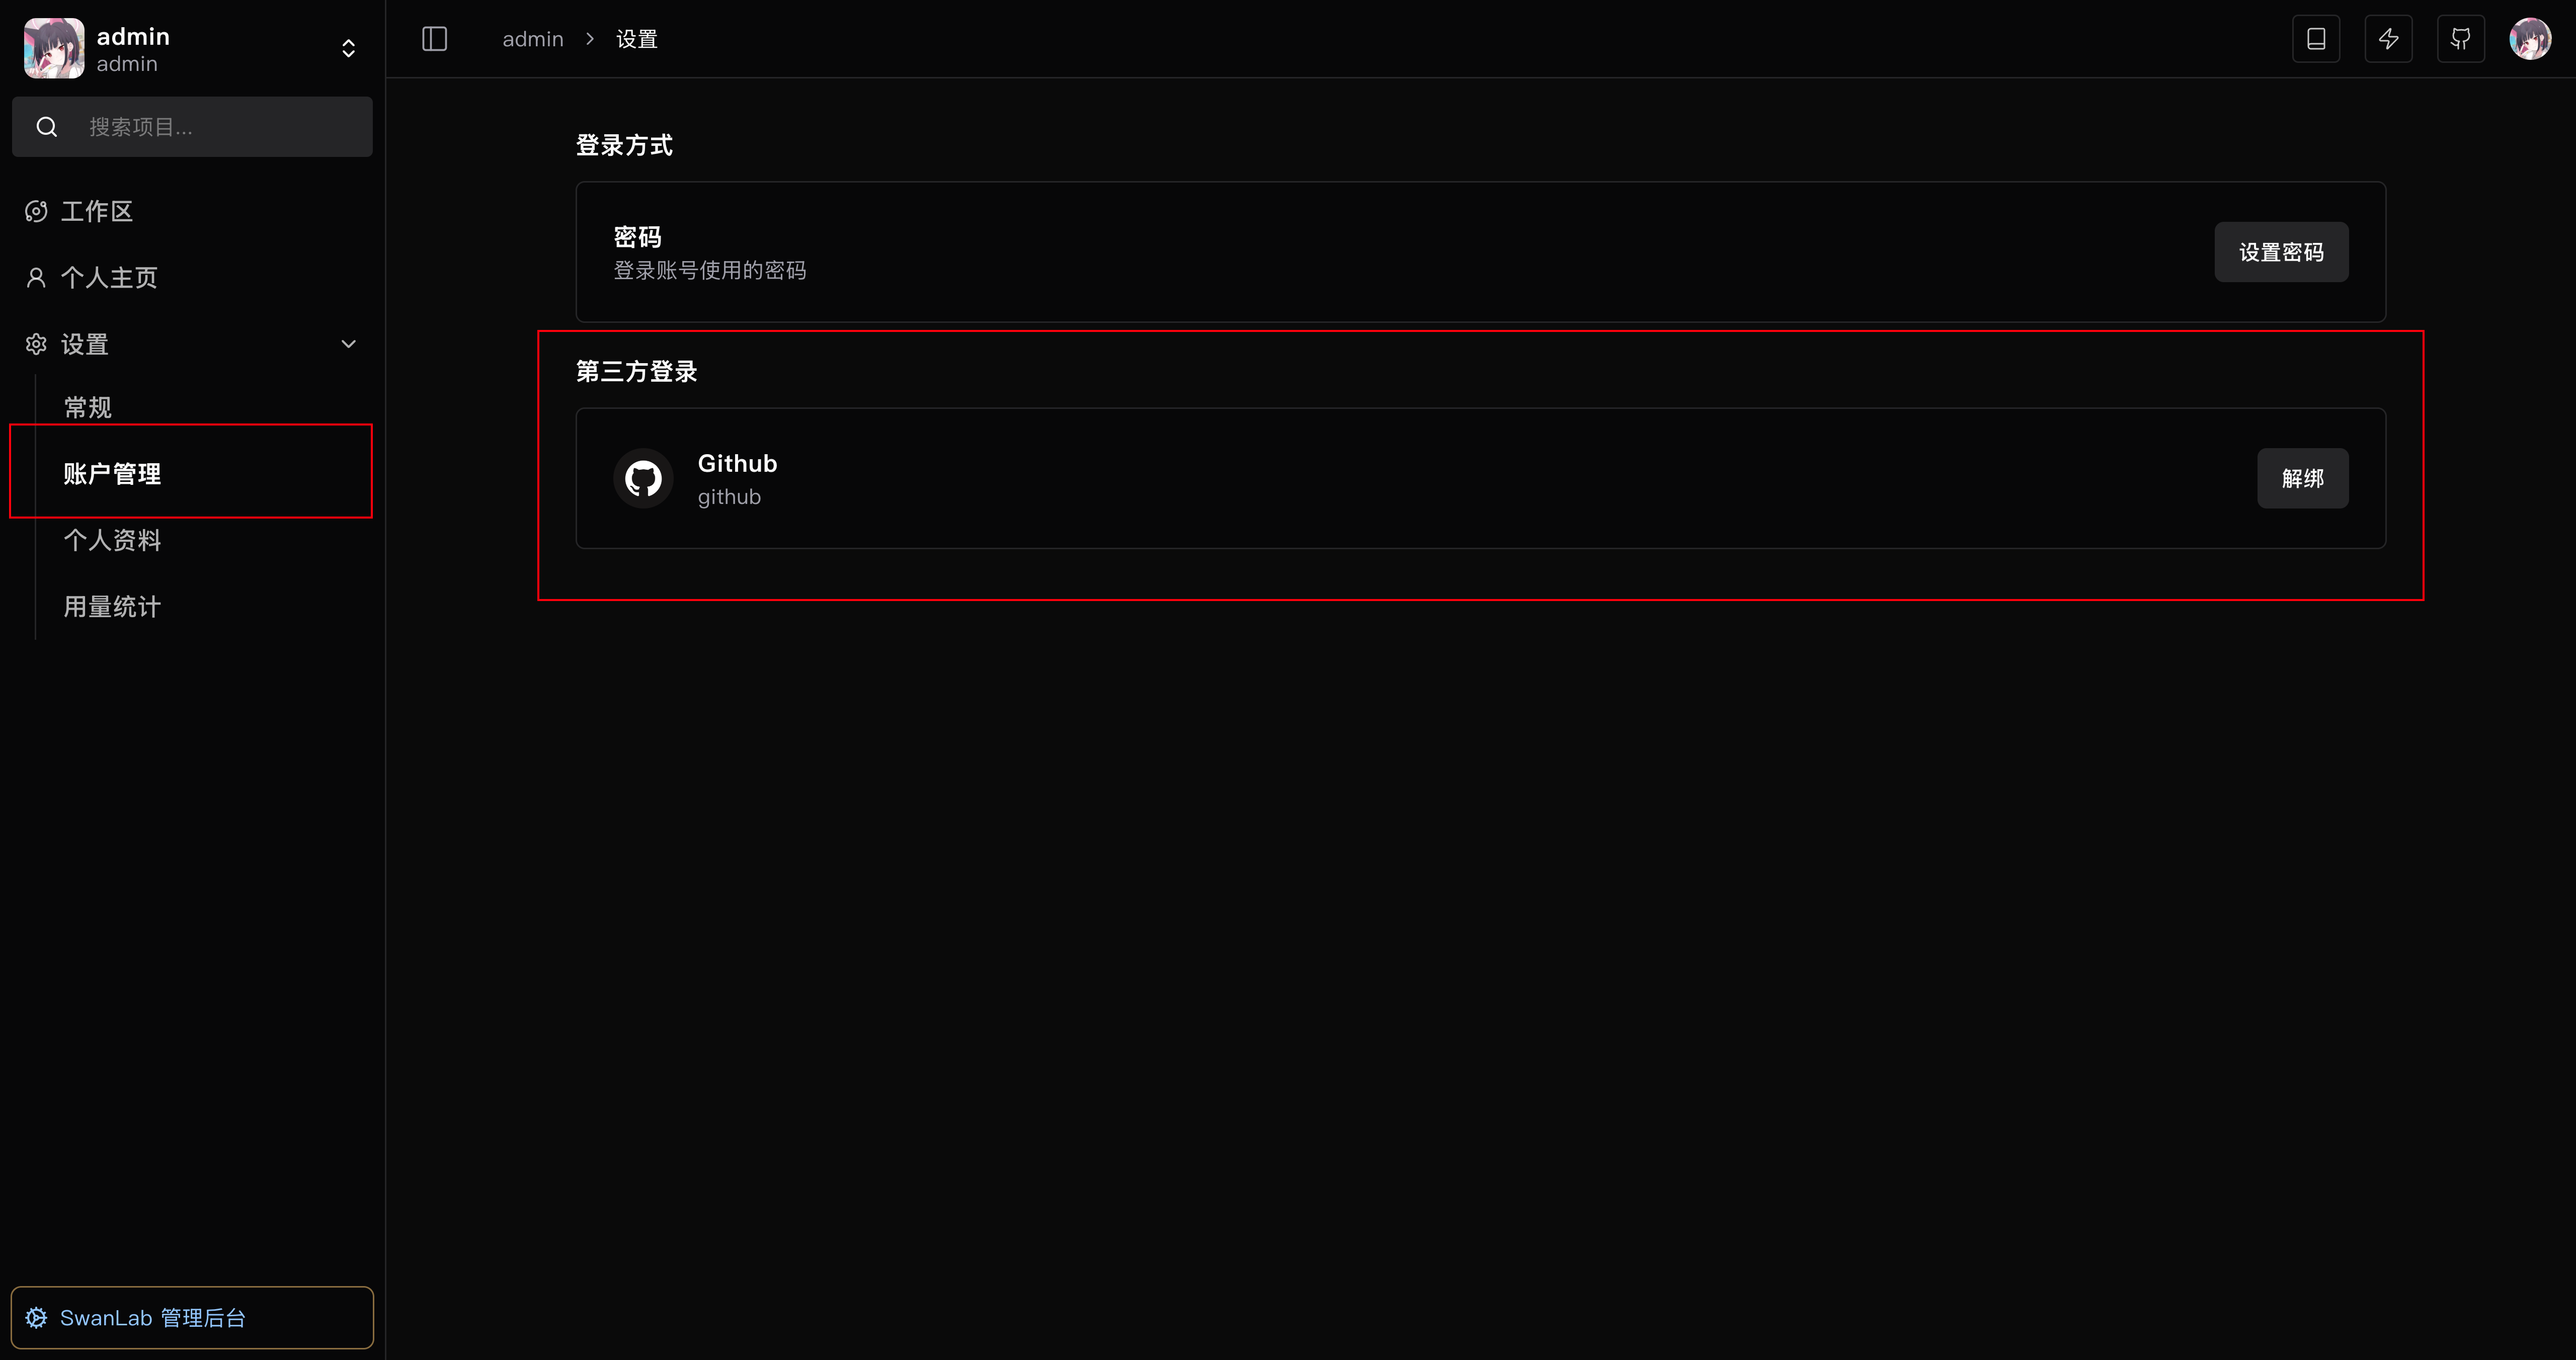
3.2 Unbinding Policy
Users can view or manage their bound identities in account settings:
- OAuth2 allows users to unbind.
- OIDC/SAML2 accounts created automatically do not currently allow users to unbind by themselves.
4. User Login Flow
- The user opens the SwanLab login page and clicks the enterprise SSO login entry.
- The page redirects to the enterprise identity provider, where the user authenticates with an enterprise account.
- After authentication succeeds, the user returns to SwanLab.
- SwanLab completes login, binds an existing account, or automatically creates an account according to the current account status.
Bound users log in to SwanLab directly. If the bound SwanLab user has been disabled, the login attempt is blocked.
5. Administrator Actions
Administrators can perform the following actions:
| Action | Description |
|---|---|
| Create Provider | Add an OAuth2, OIDC, or SAML2 Provider |
| Edit Provider | Modify the display name, protocol fields, mapping fields, logo, sort value, and enabled status |
| Enable/disable Provider | Only enabled Providers appear on the login page |
| Test Provider | Start an SSO authentication test and view field mapping and raw user information |
| Delete Provider | Delete the Provider and cascade-delete the bindings under this Provider |
Provider testing does not log in, bind, or create an account. It is only used to confirm that the IdP configuration and field mapping are correct.
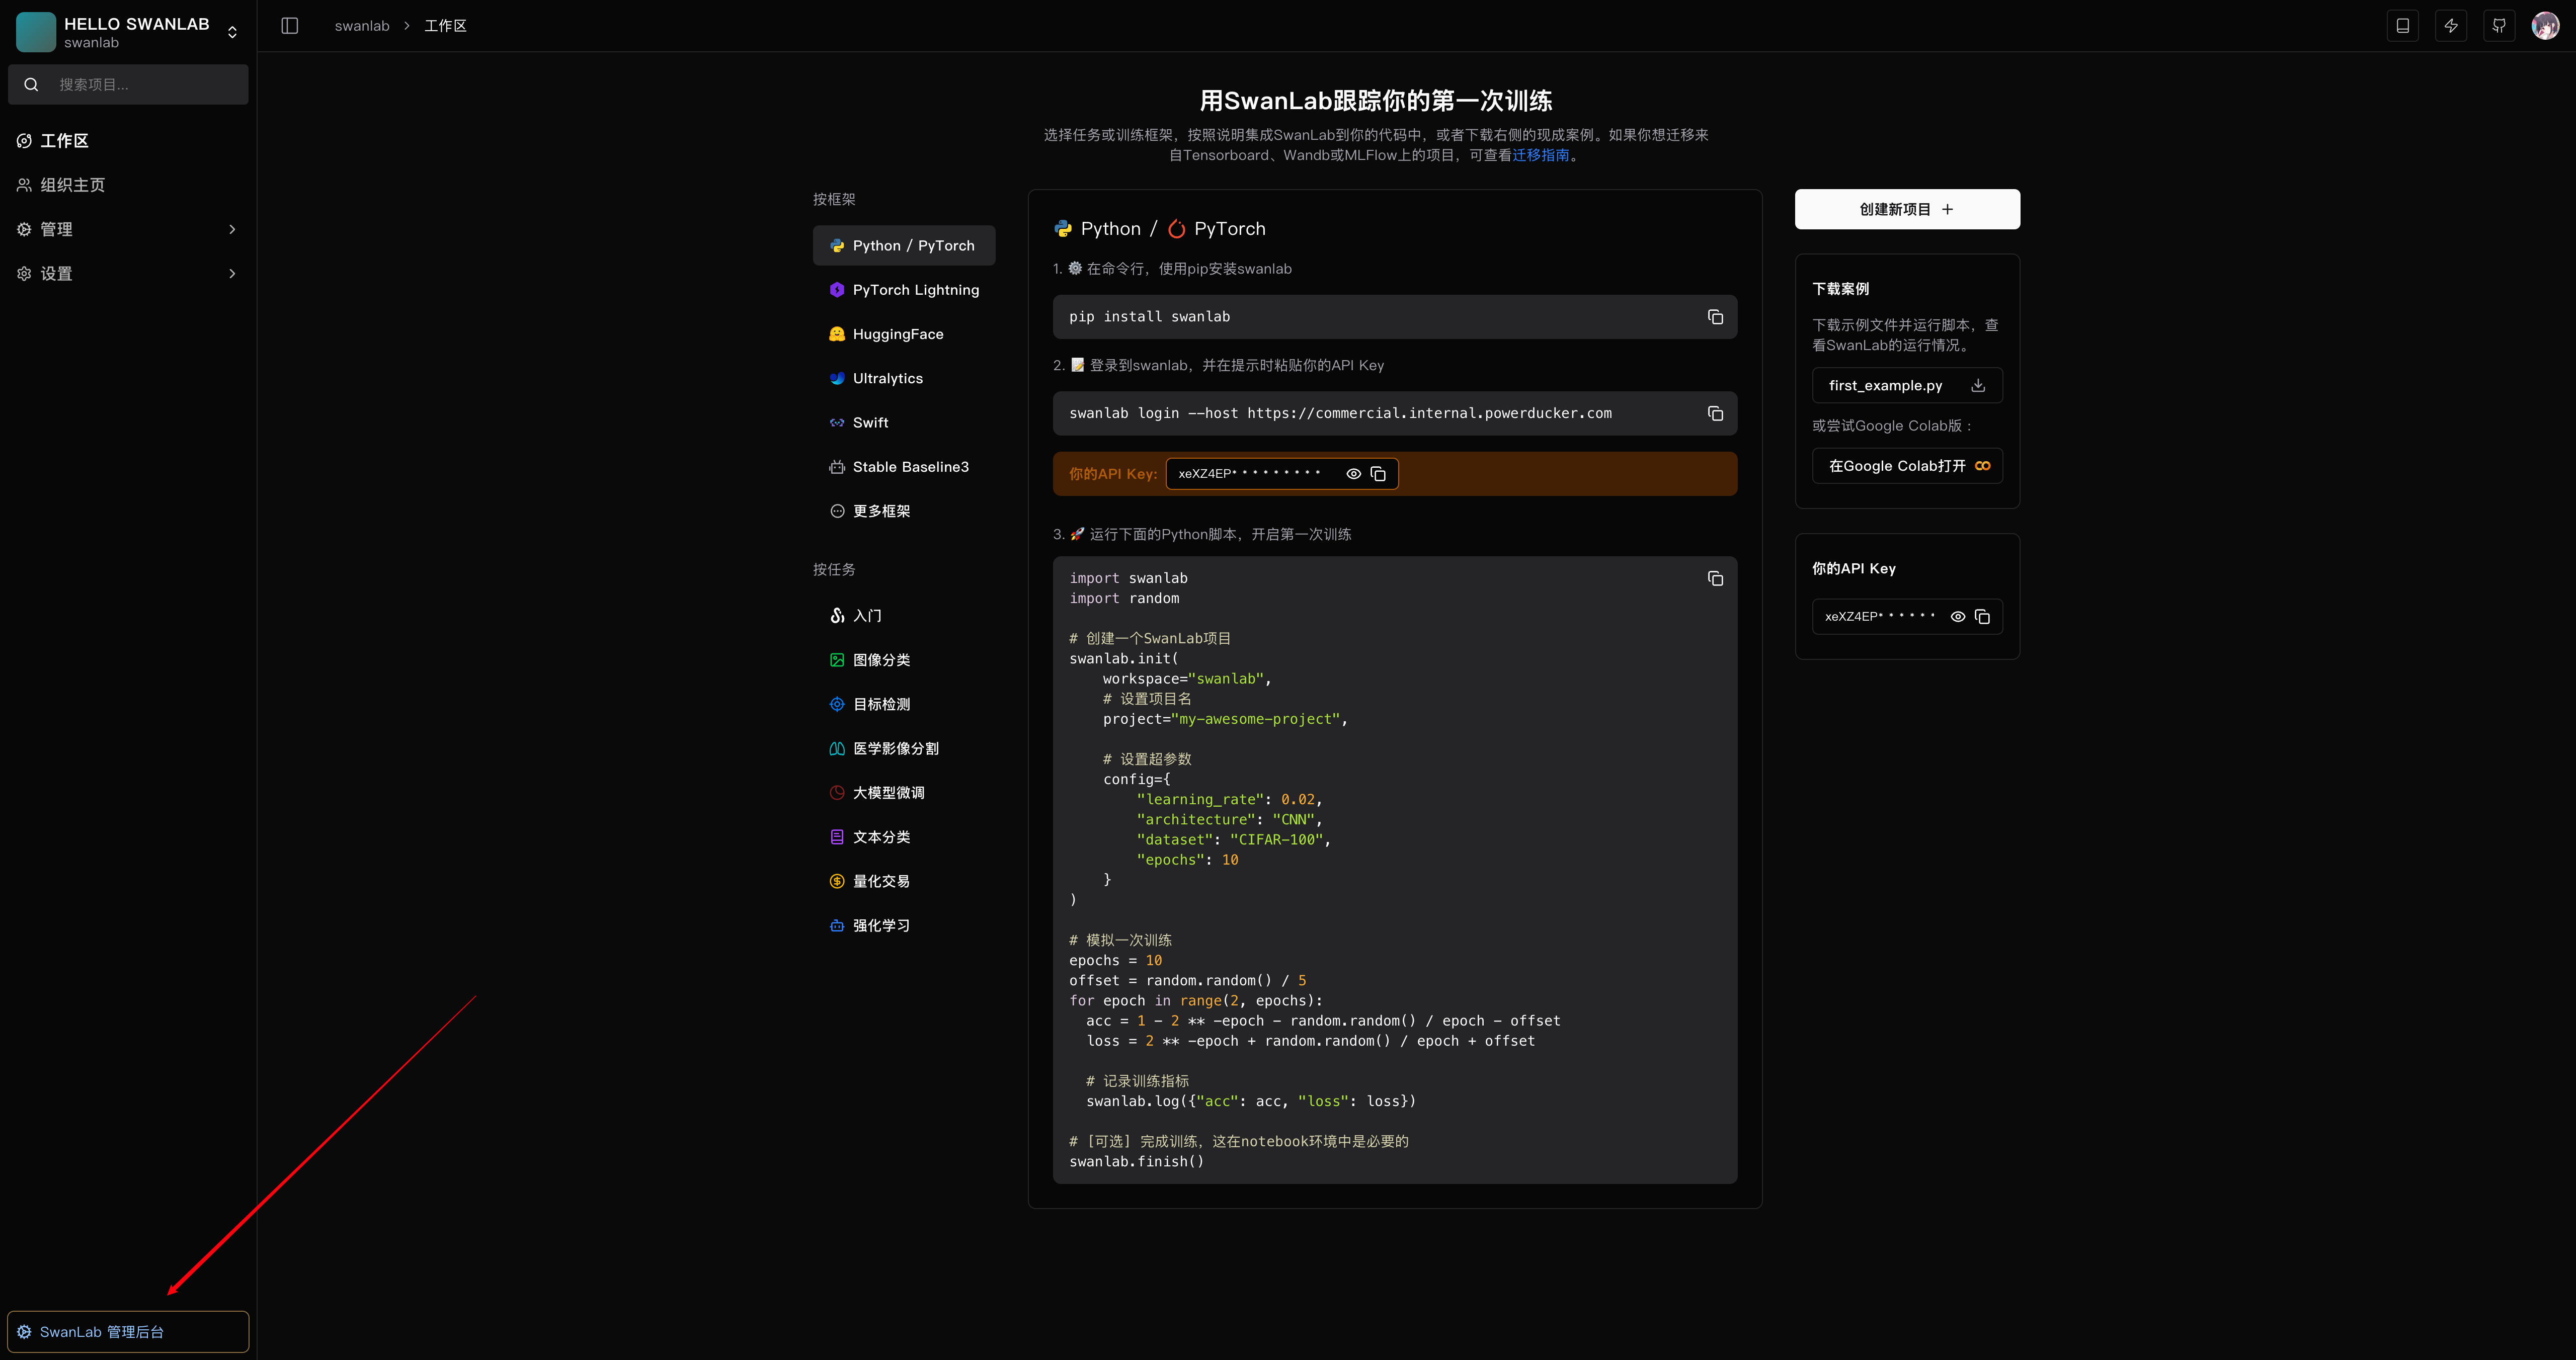
Open the administrator control panel.
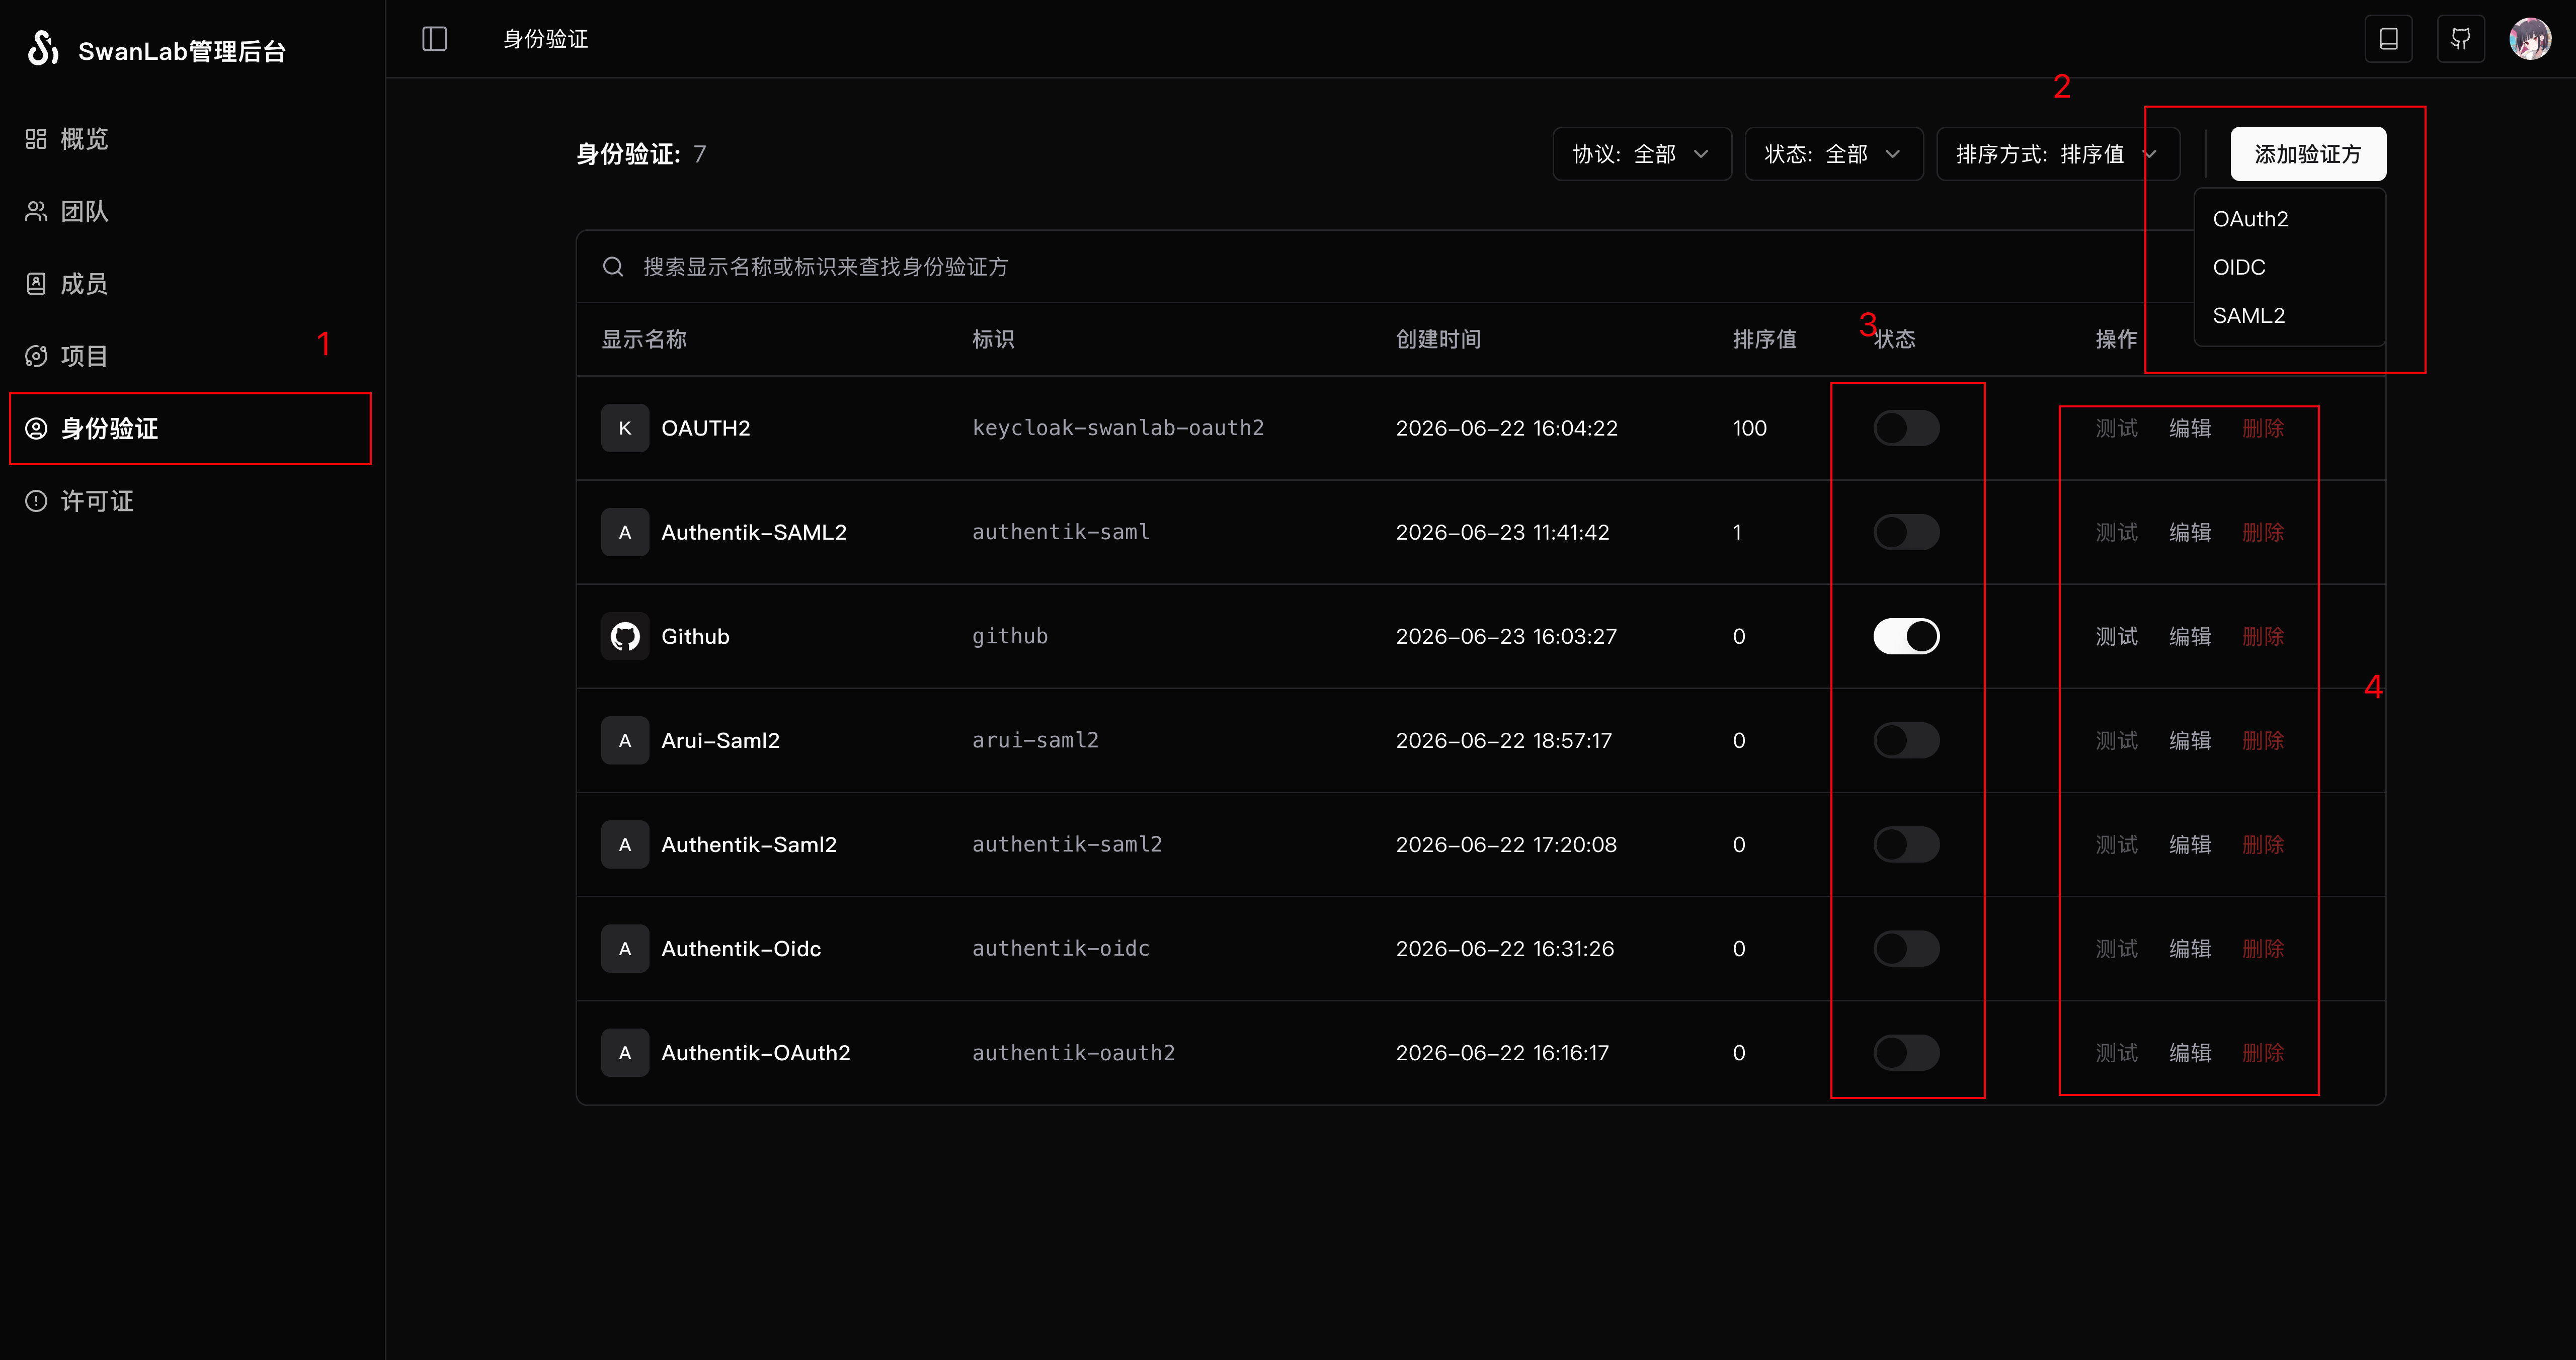
Open the "Authentication" control panel, select a protocol, and create a Provider. You can choose whether to enable it, and later test, edit, or delete it from "Actions".
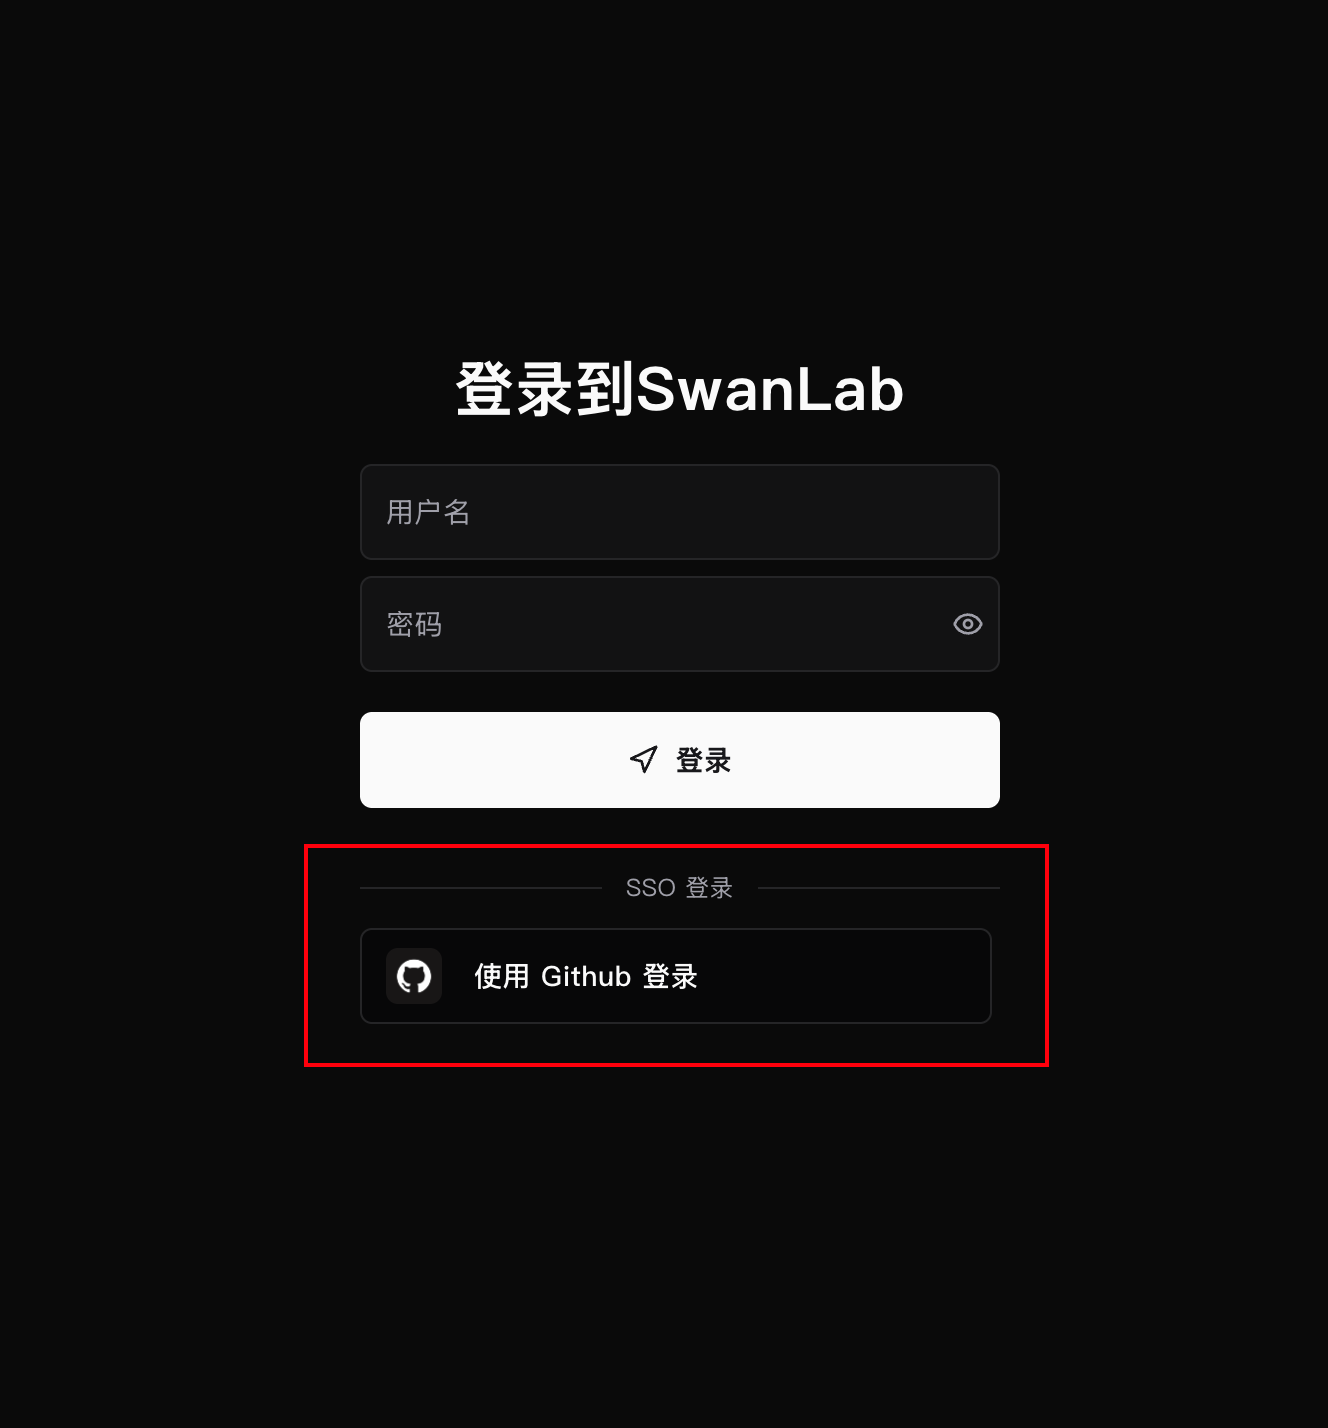
Enabled IdPs appear on the login page. Click one to start SSO authentication.
6. Common Issues
| Symptom | Common causes |
|---|---|
| No SSO entry on the login page | The Provider is not enabled, or the login entry is not displayed |
| Return address mismatch | The Redirect URI, ACS, or EntityID configured in the IdP does not match the actual external SwanLab address |
| IdP authentication succeeds but SwanLab login fails | User field mapping is incorrect, or the third-party user ID is empty |
| OIDC login fails | Issuer/Discovery is inaccessible, the scope does not include openid, ID Token validation fails, or nonce does not match |
| SAML2 login fails | Metadata is inaccessible, the certificate/private key does not match, ACS/EntityID is incorrect, or the Assertion lacks mapped attributes |
| Automatic account creation fails | The username is invalid, the username conflicts, or license seats are insufficient |