Configure OAuth2 SSO Login as an Administrator (Keycloak Example)
This document describes how to configure an OAuth2 SSO Provider in SwanLab, as well as the callback address required on the IdP side.
1. Feature Introduction
OAuth2 SSO applies to identity services that only provide the OAuth2 Authorization Code flow. SwanLab redirects to the IdP authorization page, exchanges the authorization code for an Access Token, and then calls the Userinfo endpoint to read third-party user information.
Account policy:
- First-time OAuth2 login must be bound to an existing SwanLab account.
- Bound users log in directly after authentication succeeds.
2. Procedure
2.1 SwanLab Configuration
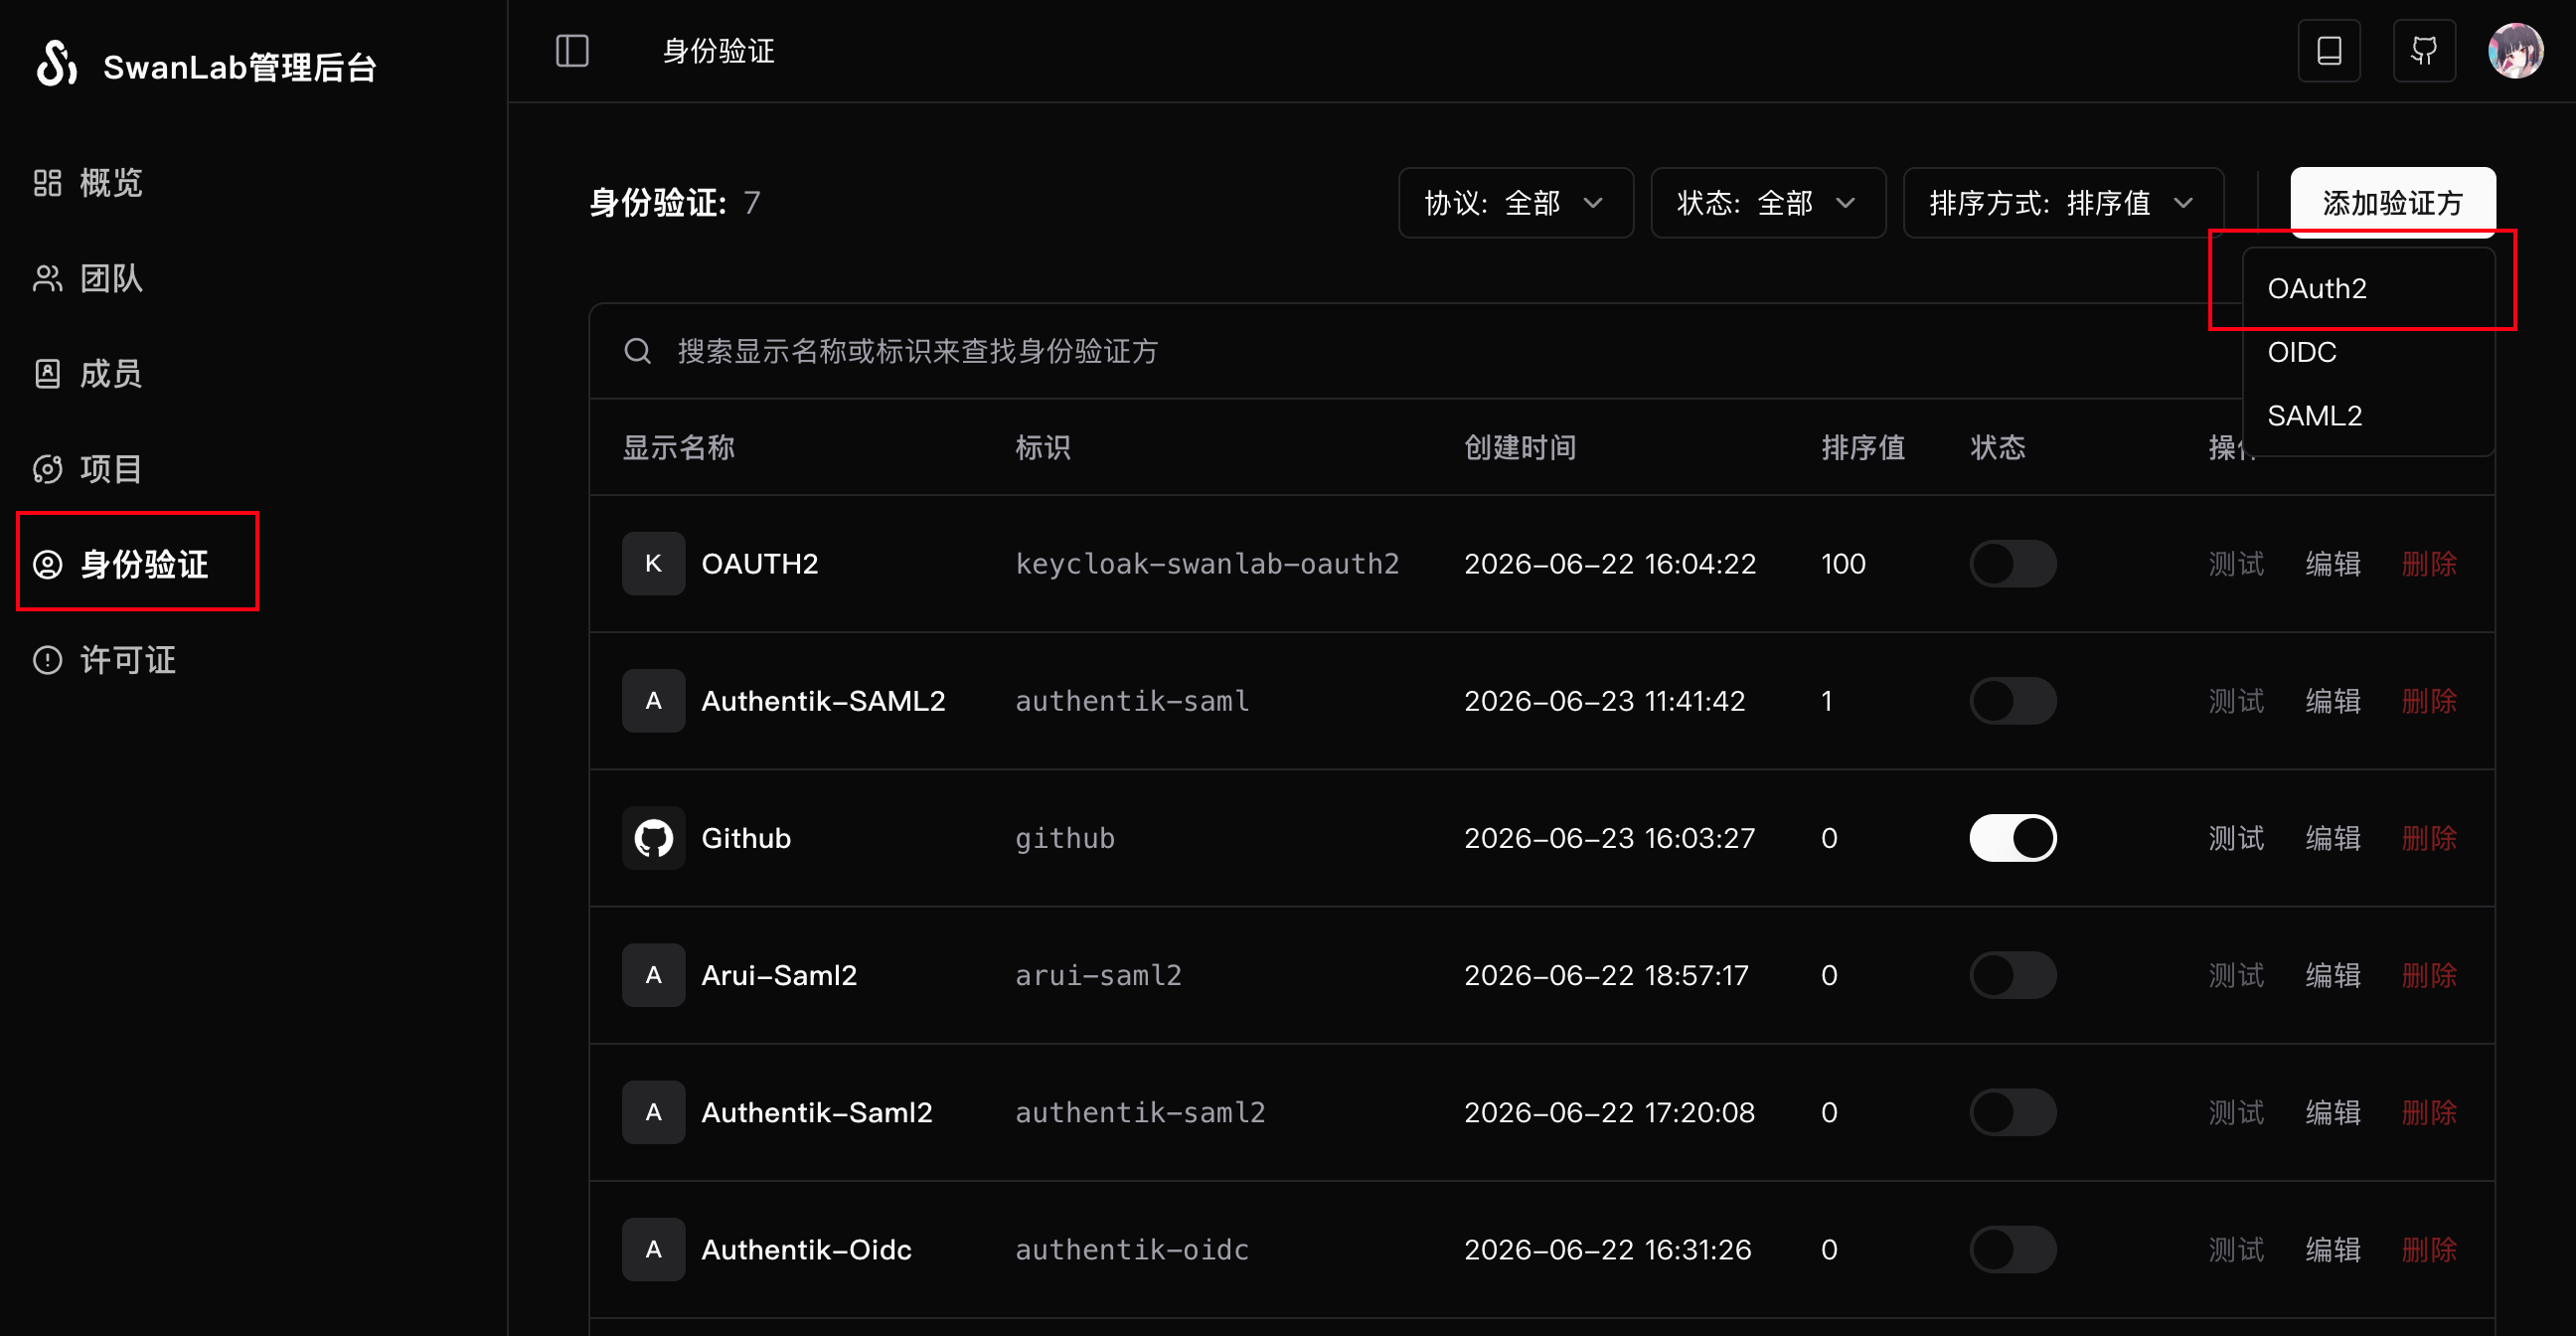
- In the SwanLab administrator control panel, click to create OAuth2.
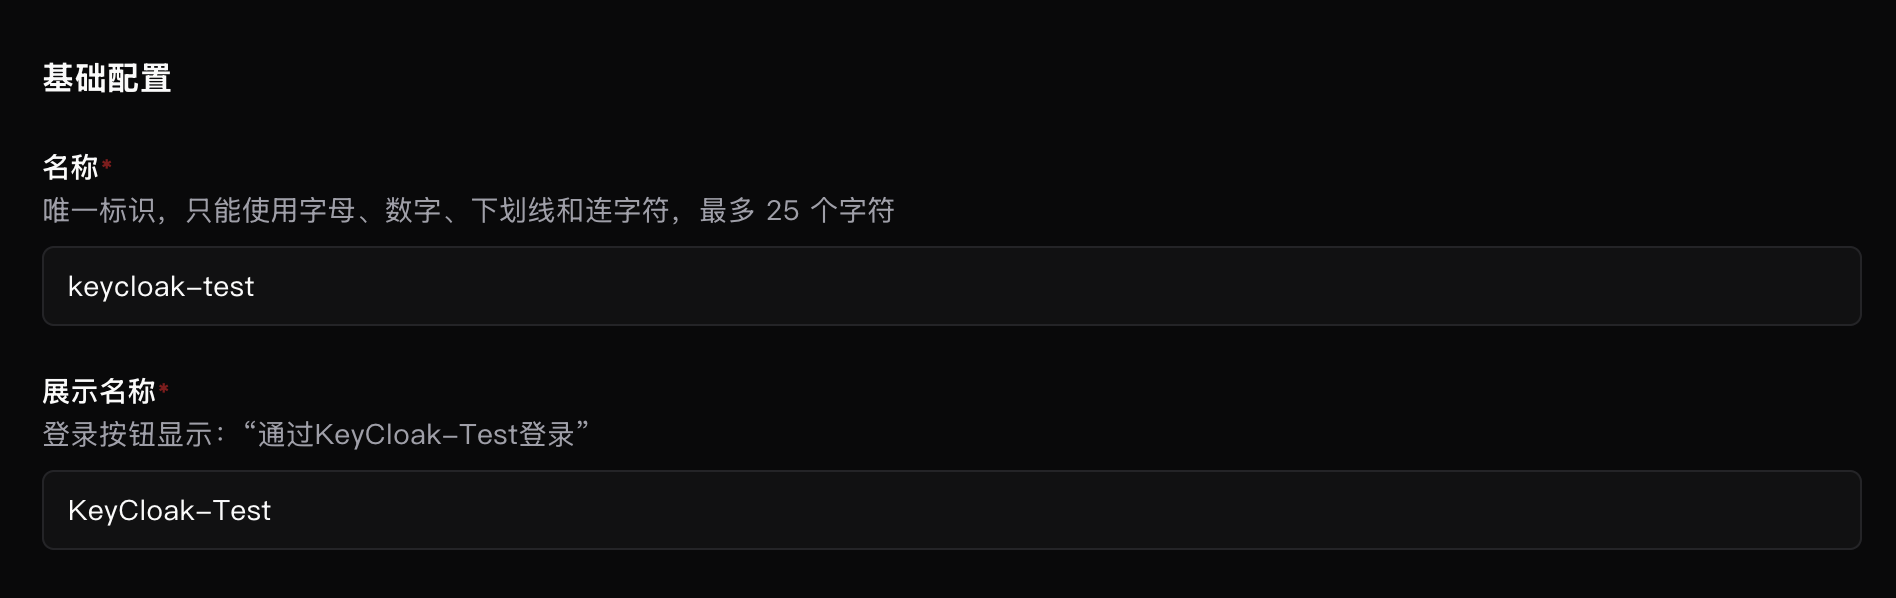
- Fill in the basic configuration.
| Field | Required | Description |
|---|---|---|
| Name | Yes | Unique Provider identifier. Up to 25 characters. Only letters, digits, underscores, and hyphens are allowed |
| Display name | Yes | Name shown on the login button. Up to 100 characters |
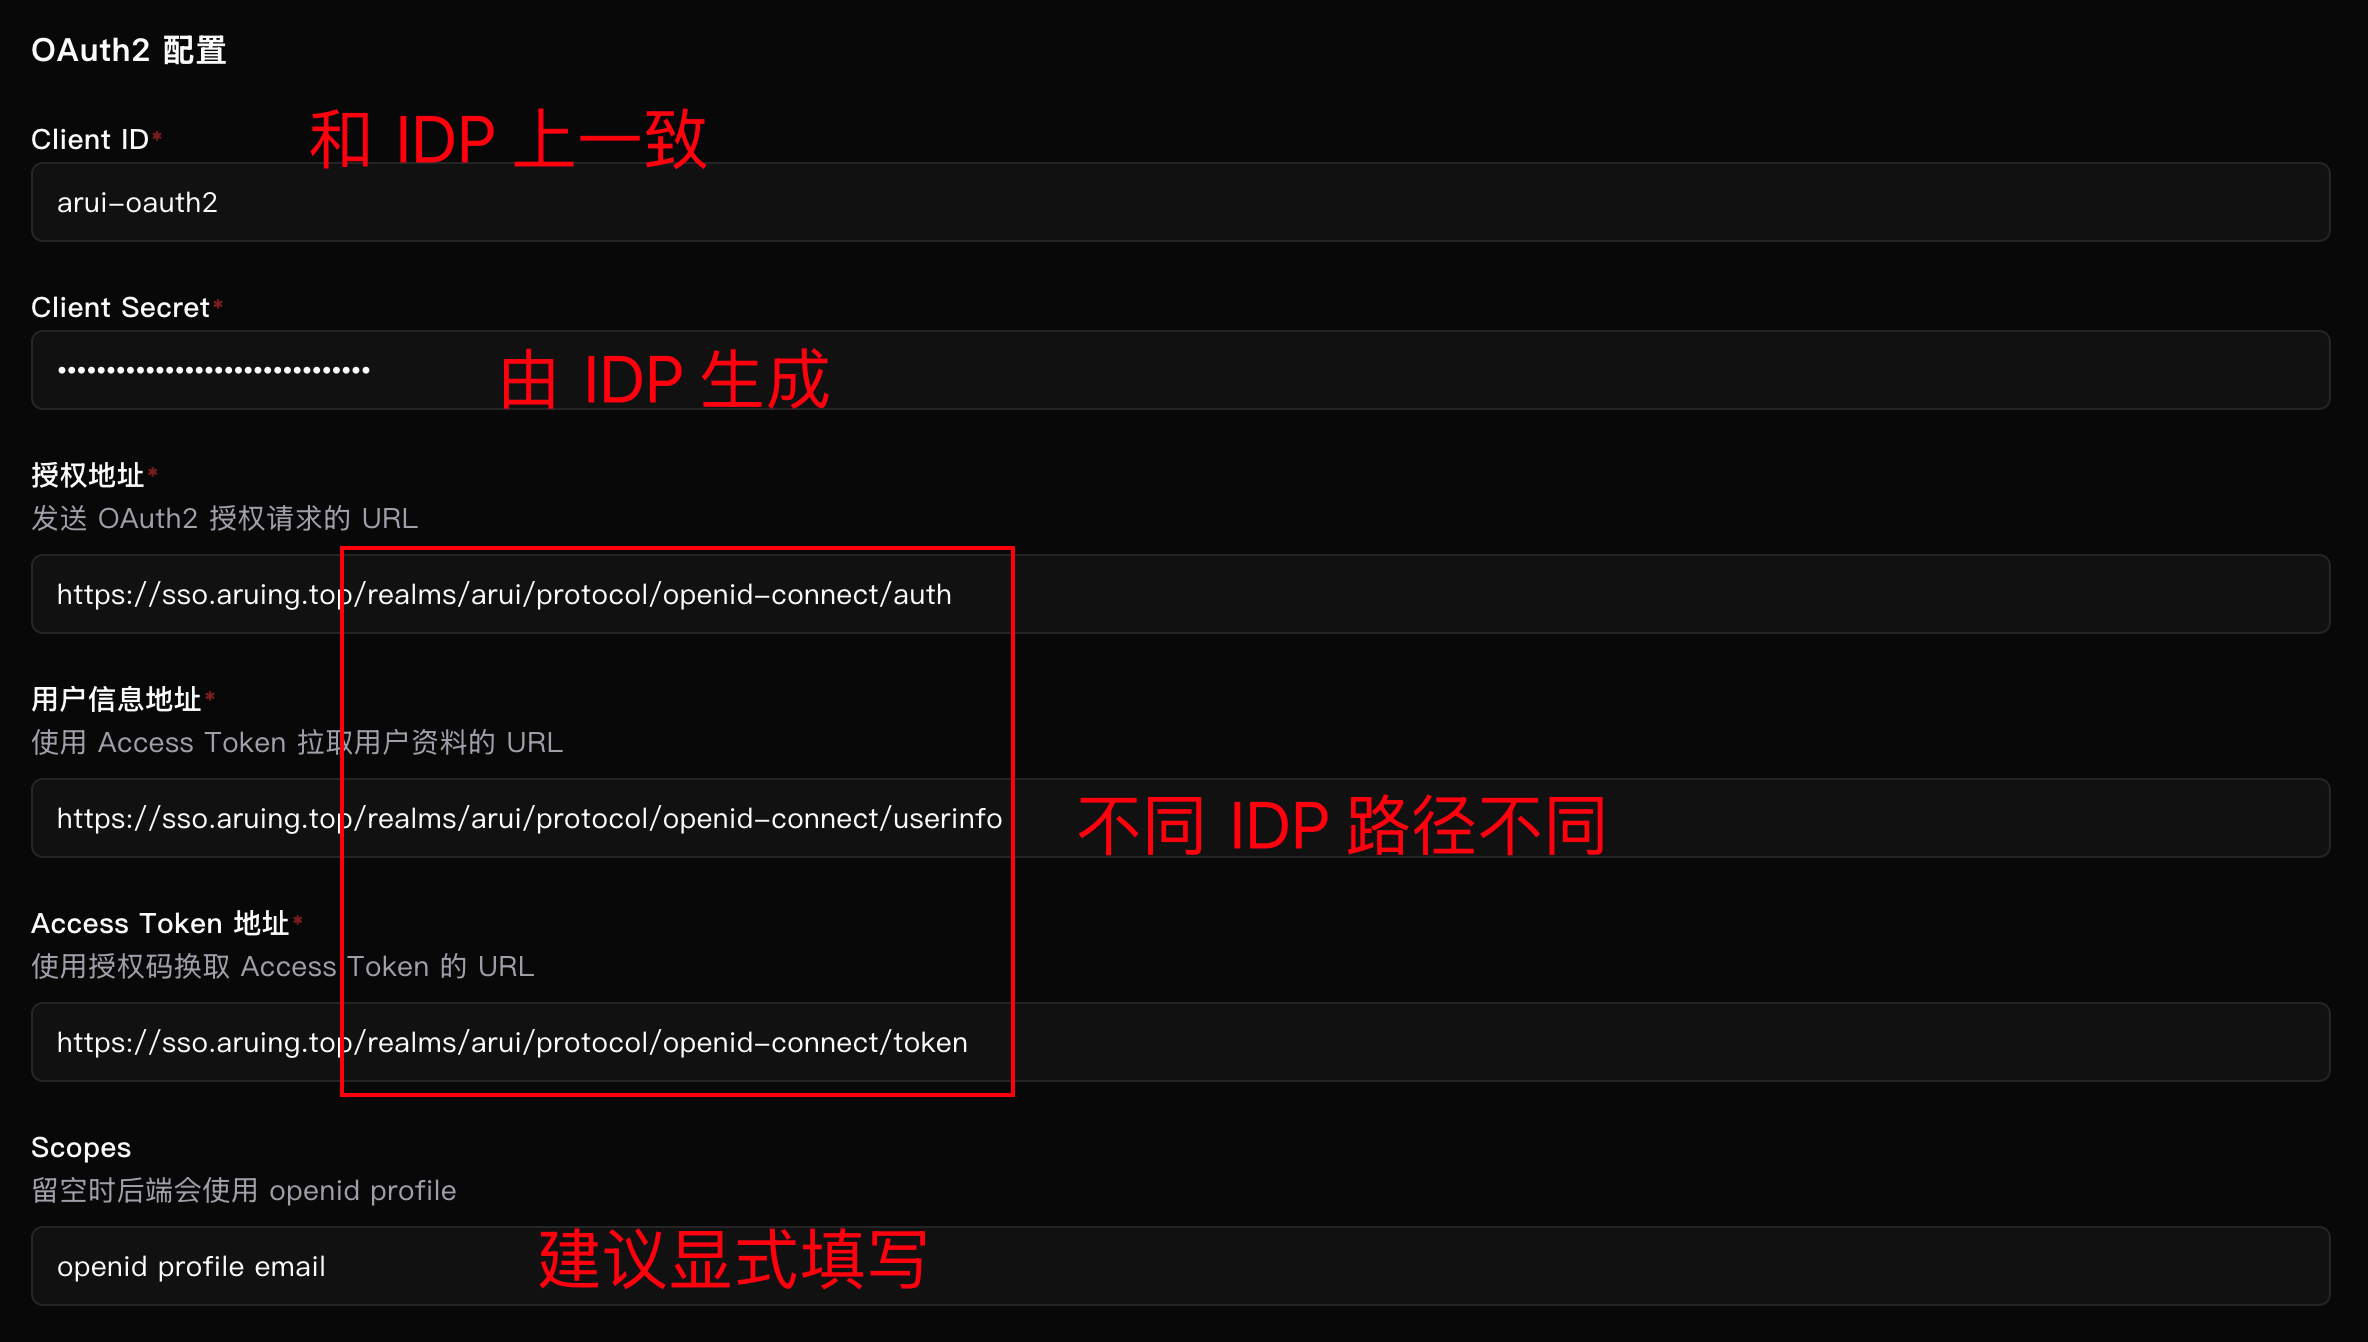
- Fill in the OAuth2 configuration.
| Field | Required | Description |
|---|---|---|
| Client ID | Yes | Client ID configured on the IdP. It is usually manually entered when configuring the IdP |
| Client Secret | Yes | OAuth2 Client Secret assigned to SwanLab by the IdP. It is usually generated by the IdP and must be obtained from the IdP |
| Authorization URL | Yes | OAuth2 Authorization Endpoint. Different authentication services may use different values. Check the IdP documentation |
| Access Token URL | Yes | Token Endpoint used to exchange the authorization code for an Access Token. Different authentication services may use different values. Check the IdP documentation |
| Userinfo URL | Yes | Userinfo Endpoint used to retrieve user profile data with the Access Token. Different authentication services may use different values. Check the IdP documentation |
| Scopes | No | Space-separated authorization scopes. Defaults to openid profile when left empty, but manual configuration is recommended |
"Authorization URL", "Access Token URL", and "Userinfo URL" are OAuth2 protocol fields, but different services do not have unified path requirements. For example, for "Authorization URL":
- Keycloak:
https://<IDP URL>/realms/<realm name>/protocol/openid-connect/auth - Authentik:
https://<IDP URL>/application/o/authorize/
The following uses keycloak as an example:
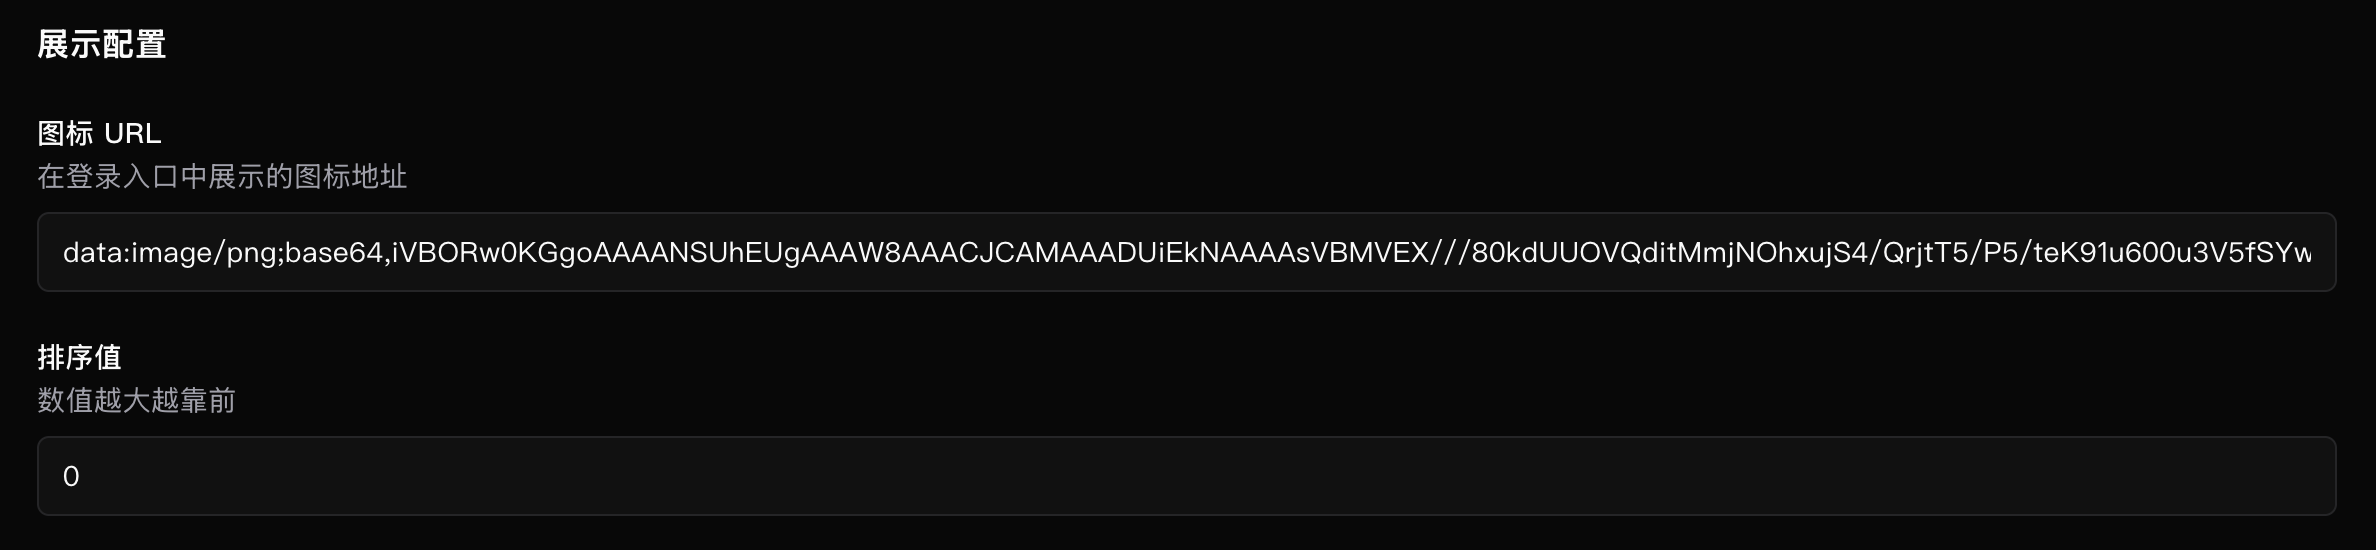
- Fill in the display configuration.
We recommend using an online link for the Icon URL.
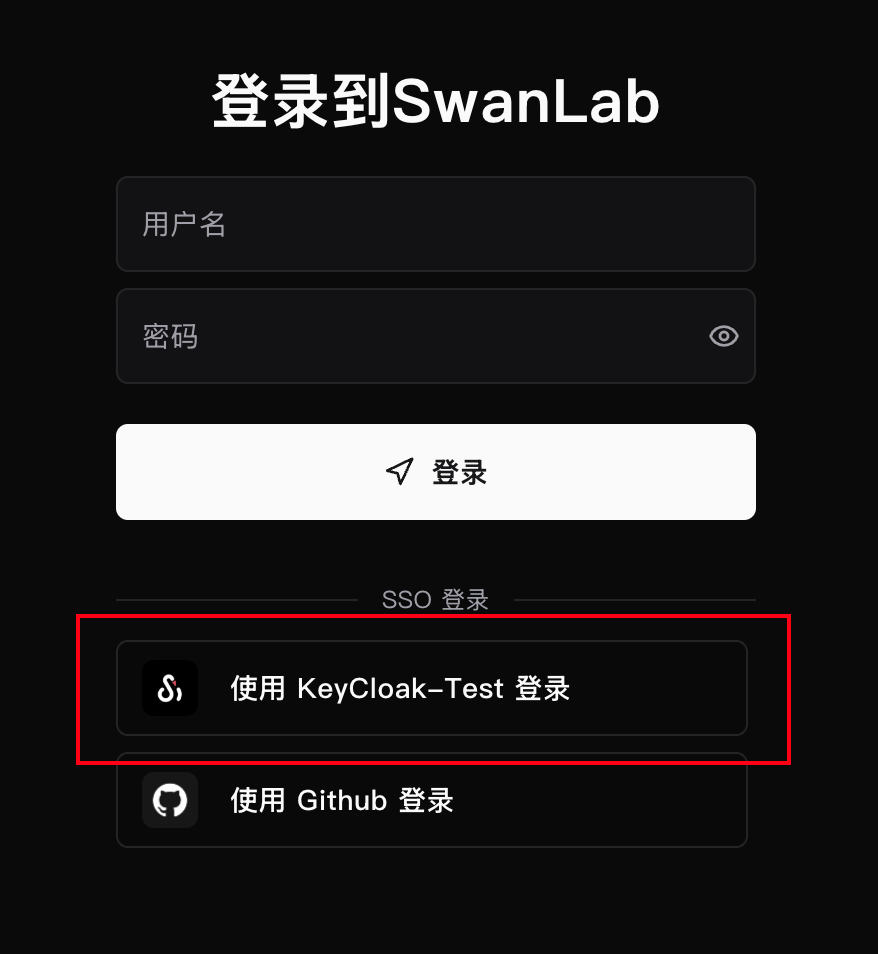
- Enable the IdP.
After creation, you can view existing IdPs in the list. After enabling one, you can test and use it:

- View it in the login list.
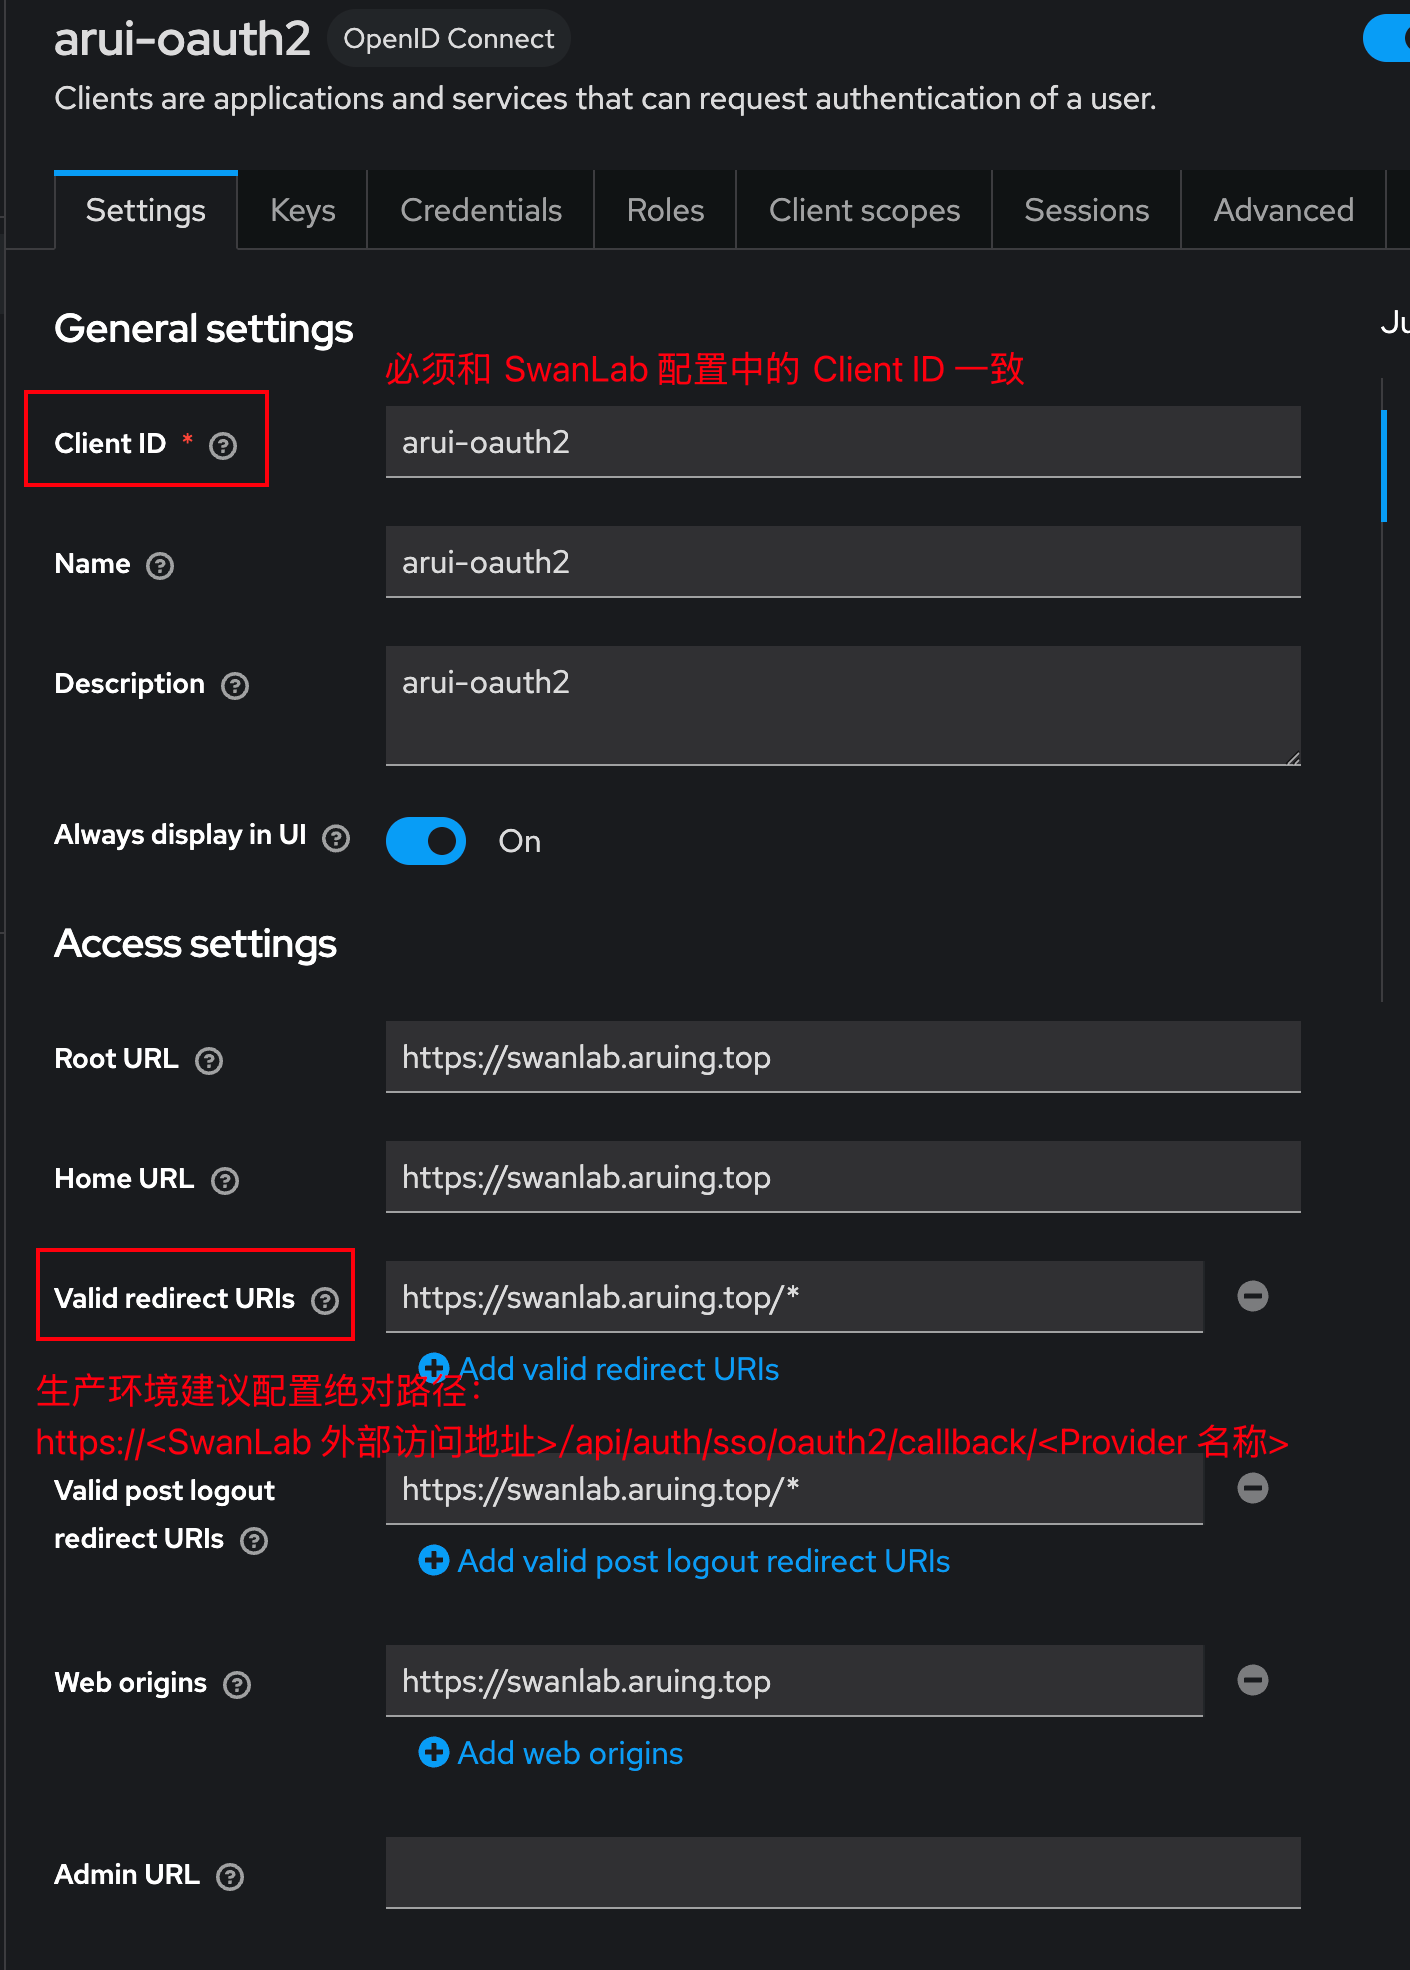
3. IdP-side Configuration
The key item to configure in the IdP OAuth2 application is the Redirect URI:
https://<SwanLab external access address>/api/auth/sso/oauth2/callback/<Provider name>Ensure that this address exactly matches the address generated by SwanLab, including protocol, domain, port, subpath, and Provider name.
Example:
https://swanlab.example.com/api/auth/sso/oauth2/callback/arui-oauth2The following uses keycloak as an example:
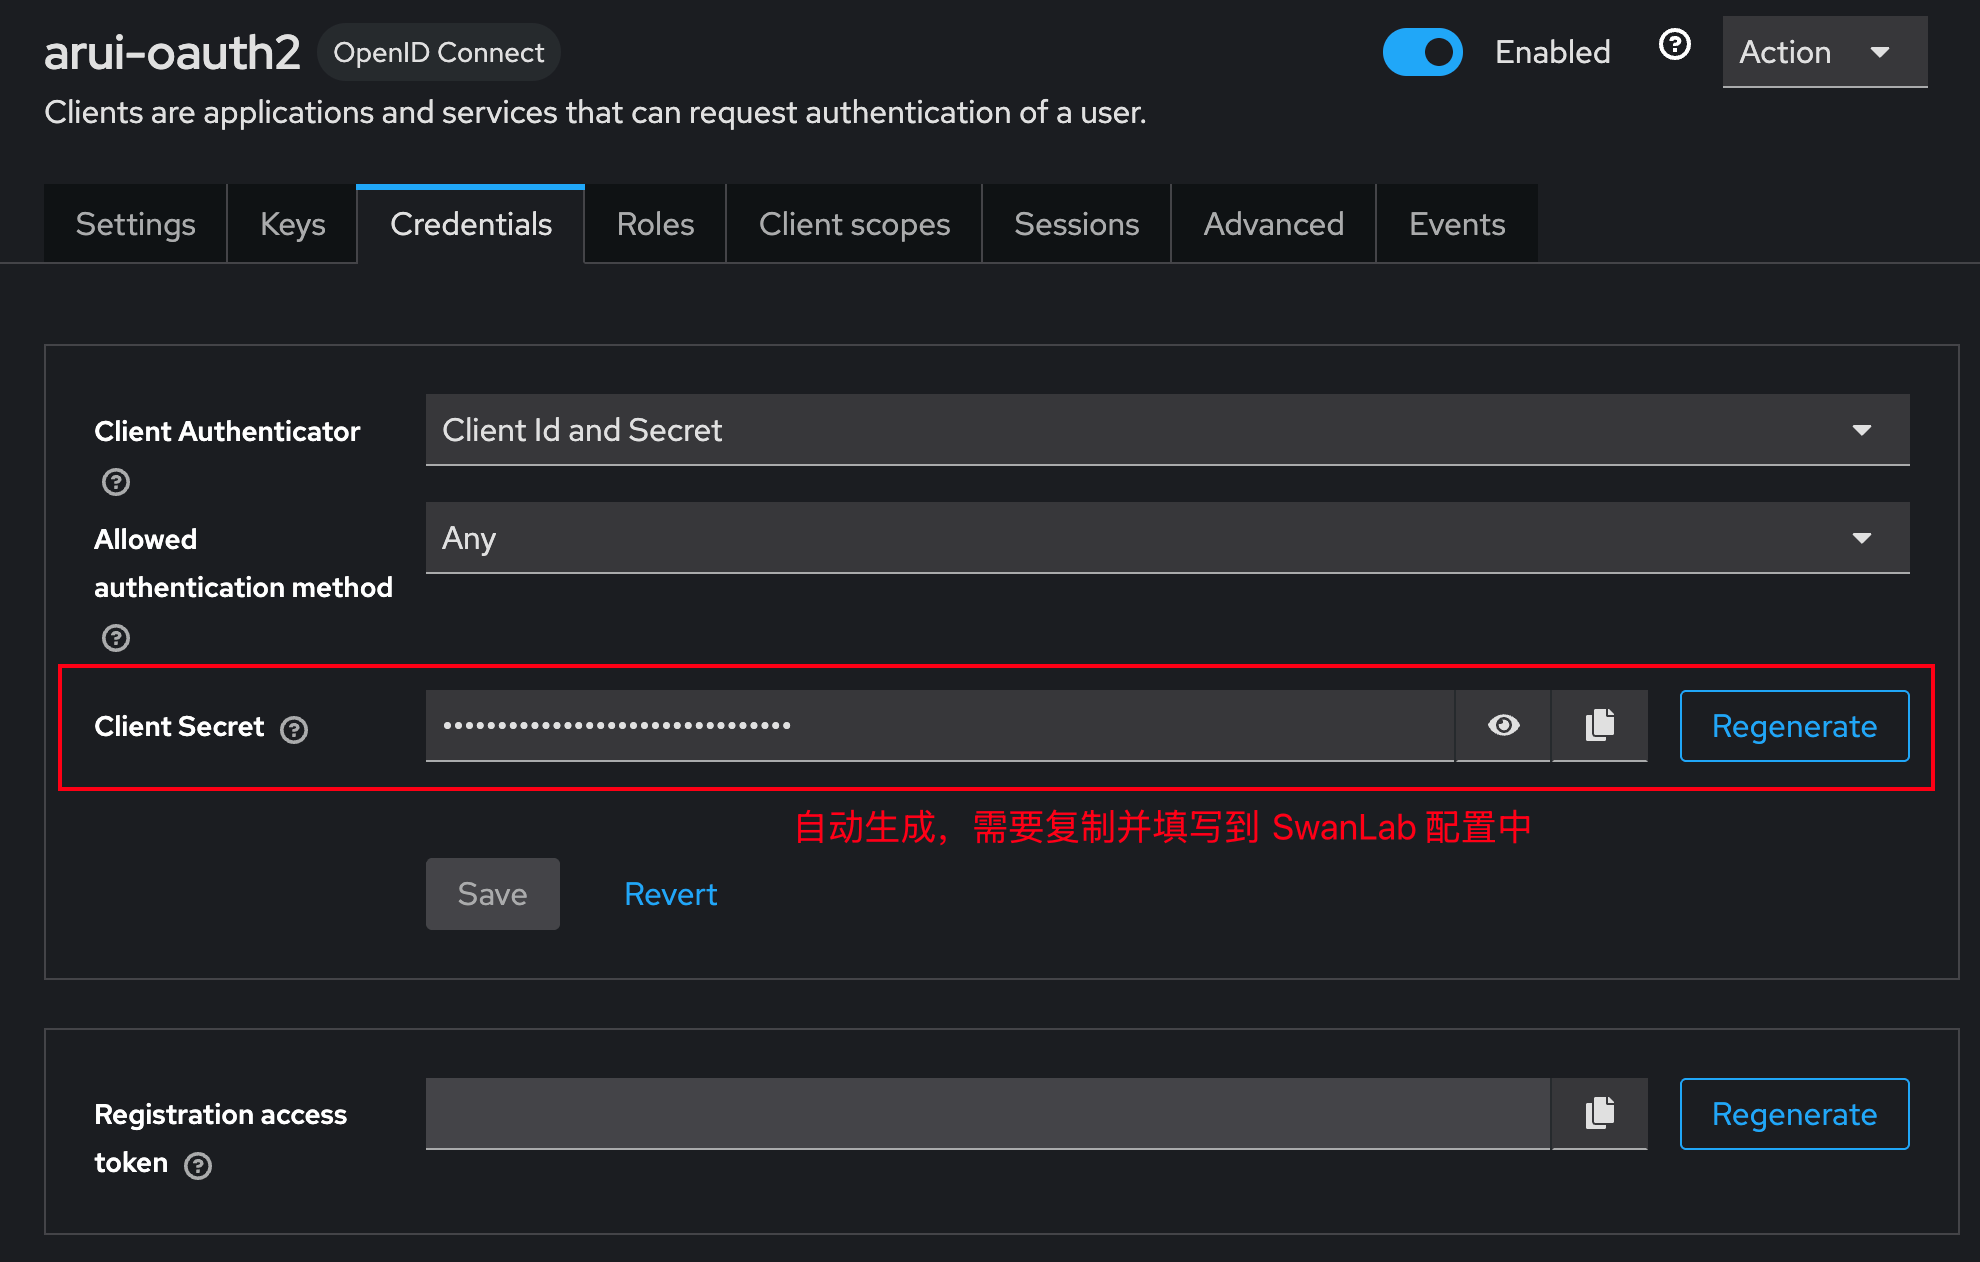
The Client Secret is usually generated by the IdP. Copy it and fill it in the SwanLab configuration: