Contributing to SwanLab
Interested in contributing to SwanLab? We welcome contributions from the community! This guide discusses the development workflow and internal structure of swanlab.
📦 Table of Contents
Standard Development Process
Browse the Issues on GitHub to see the features you'd like to add or bugs you'd like to fix, and whether they have already been addressed by a Pull Request.
- If not, create a new Issue — this will help the project track feature requests and bug reports and ensure that work is not duplicated.
If you are contributing to an open-source project for the first time, go to the project homepage and click the "Fork" button in the upper right corner. This will create a personal copy of the repository for your development.
- Clone the forked project to your computer and add a remote link to the
swanlabproject:
bashgit clone https://github.com/<your-username>/swanlab.git cd swanlab git remote add upstream https://github.com/swanhubx/swanlab.git- Clone the forked project to your computer and add a remote link to the
Develop your contribution
- Ensure your fork is synchronized with the main repository:
bashgit checkout main git pull upstream main- Create a
gitbranch where you will develop your contribution. Use a reasonable name for the branch, for example:
bashgit checkout -b <username>/<short-dash-seperated-feature-description>- As you make progress, commit your changes locally, for example:
bashgit add changed-file.py tests/test-changed-file.py git commit -m "feat(integrations): Add integration with the `awesomepyml` library"Submit your contribution:
- Github Pull Request
- When your contribution is ready, push your branch to GitHub:
bashgit push origin <username>/<short-dash-seperated-feature-description>After the branch is uploaded,
GitHubwill print a URL to submit your contribution as a pull request. Open that URL in your browser, write an informative title and detailed description for your pull request, and submit it.Please link the relevant Issue (existing Issue or the one you created) to your PR. See the right sidebar of the PR page. Alternatively, mention "Fixes issue link" in the PR description — GitHub will automatically link it.
We will review your contribution and provide feedback. To merge the changes suggested by the reviewer, commit the edits to your branch and push it again (no need to recreate the pull request, it will automatically track modifications to the branch), for example:
bashgit add tests/test-changed-file.py git commit -m "test(sdk): Add a test case to address reviewer feedback" git push origin <username>/<short-dash-seperated-feature-description>- Once your pull request is approved by the reviewer, it will be merged into the main branch of the repository.
Local Debugging
IDE and Plugins
Use VSCode as your development IDE
The SwanLab repository has already configured the VSCode environment, plugins, and debugging scripts (located in the
.vscodefolder). Developing SwanLab with VSCode will provide the best experience.Install VSCode Plugins (Optional)
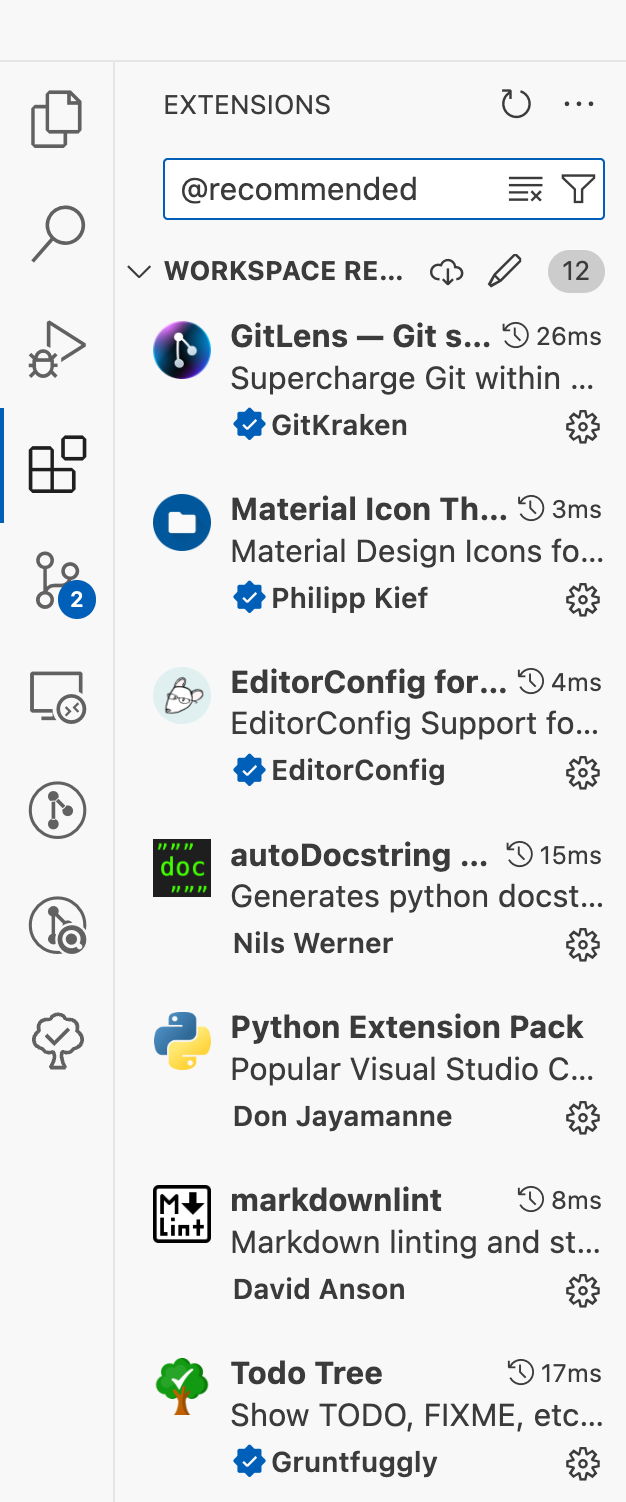
Open the project with VSCode, go to [Extensions], enter "@recommended" in the search box, and a series of recommended plugins will appear. It is recommended to install all these plugins.

Configuring Python Environment
The SwanLab project environment requires python>=3.8.
The necessary Python dependencies are centrally recorded in requirements.txt in the project root directory.
Start the terminal in the project root directory and run the following command to install the dependencies:
# Packages required by swanlab
pip install -r requirements.txt
pip install -r requirements-media.txt
Additional dependencies are required for compilation, development, unit testing, etc.:
# Packages required for compilation, unit testing, etc.
pip install -r requirements-dev.txt
Debugging Scripts
- VSCode Debugging Scripts
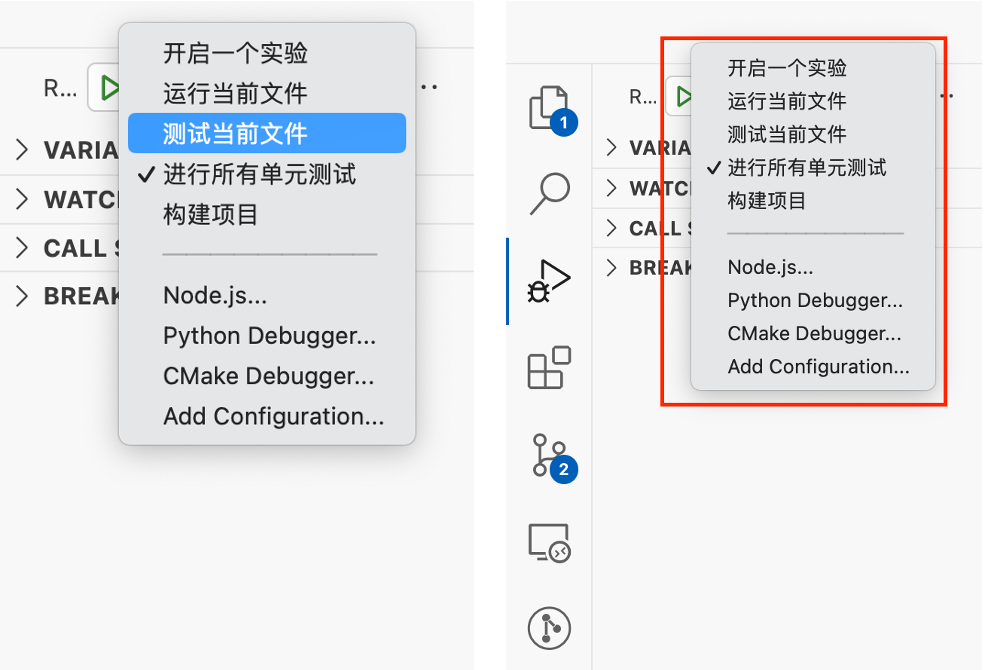
In VSCode - Run and Debug, the project has configured a series of debugging scripts:

Start an Experiment: Run the
test/create_experiment.pyscriptRun the Current File: Use the configured Python environment to run the file you selected
Test the Current File: Test the file you selected in debug mode
Run All Unit Tests: Run the scripts in
test/unitto perform a complete unit test of the basic functions of swanlab(Skip Cloud) Run All Unit Tests: Run the scripts in
test/unitto perform a complete unit test of the basic functions of swanlab, but skip cloud testingBuild the Project: Package the project into a whl file (pip installation package format)
Ps: If you do not want to use VSCode for development, you can go to .vscode/launch.json to view the command corresponding to each debugging item to understand its configuration.
Local Testing
The prerequisite for testing is that you have installed all the required dependencies.
Python Script Debugging
After completing your changes, you can place your Python test script in the root directory or the test folder, and then use the "Run the Current File" in VSCode Scripts to run your Python test script. This way, your script will use the modified swanlab.
Unit Testing
You can perform unit testing through VSCode Scripts or by running the following command in the project root directory:
export PYTHONPATH=. && pytest test/unitSince swanlab involves interaction with the cloud, and the cloud part is closed-source, the simplest way if you are contributing code for the first time is to only perform local testing. For this situation, create a .env file in the local root directory and fill in the following environment variable configuration:
SWANLAB_RUNTIME=test-no-cloudThis will skip cloud testing and only perform local part function testing. If you want to perform complete testing, please supplement the following information in .env:
SWANLAB_RUNTIME=test
SWANLAB_API_KEY=<your API KEY>
SWANLAB_API_HOST=https://swanlab.cn/api
SWANLAB_WEB_HOST=https://swanlab.cn
Note: When performing cloud testing, some useless test experiment data will be generated under your cloud account, which needs to be manually deleted
After configuring, you can run the complete test