Audio Classification
INFO
Introduction to Audio Classification and Audio Processing
Audio classification tasks involve categorizing audio signals based on their content. For example, distinguishing whether an audio clip is music, speech, environmental sounds (like bird chirps, rain, or machine noises), or animal sounds. The goal is to efficiently organize, retrieve, and understand large amounts of audio data through automatic classification.

In current audio classification applications, it is often used for audio annotation and recommendation. It is also a great task for getting started with audio model training.
In this article, we will train a ResNet series model on the GTZAN dataset using the PyTorch framework, and use SwanLab to monitor the training process and evaluate the model's performance.
- Github: https://github.com/Zeyi-Lin/PyTorch-Audio-Classification
- Dataset: https://pan.baidu.com/s/14CTI_9MD1vXCqyVxmAbeMw?pwd=1a9e Extraction Code: 1a9e
- SwanLab Experiment Logs: https://swanlab.cn/@ZeyiLin/PyTorch_Audio_Classification-simple/charts
- More Experiment Logs: https://swanlab.cn/@ZeyiLin/PyTorch_Audio_Classification/charts
1. Audio Classification Logic
The logic for this tutorial's audio classification task is as follows:
- Load the audio dataset, which consists of audio WAV files and corresponding labels.
- Split the dataset into training and testing sets in an 8:2 ratio.
- Use the
torchaudiolibrary to convert audio files into Mel spectrograms, essentially transforming it into an image classification task. - Train the ResNet model on the Mel spectrograms.
- Use SwanLab to record the loss and accuracy changes during the training and testing phases, and compare the effects of different experiments.
2. Environment Setup
This example is based on Python>=3.8. Please ensure Python is installed on your computer.
We need to install the following Python libraries:
torch
torchvision
torchaudio
swanlab
pandas
scikit-learn
One-click installation command:
pip install torch torchvision torchaudio swanlab pandas scikit-learn3. GTZAN Dataset Preparation
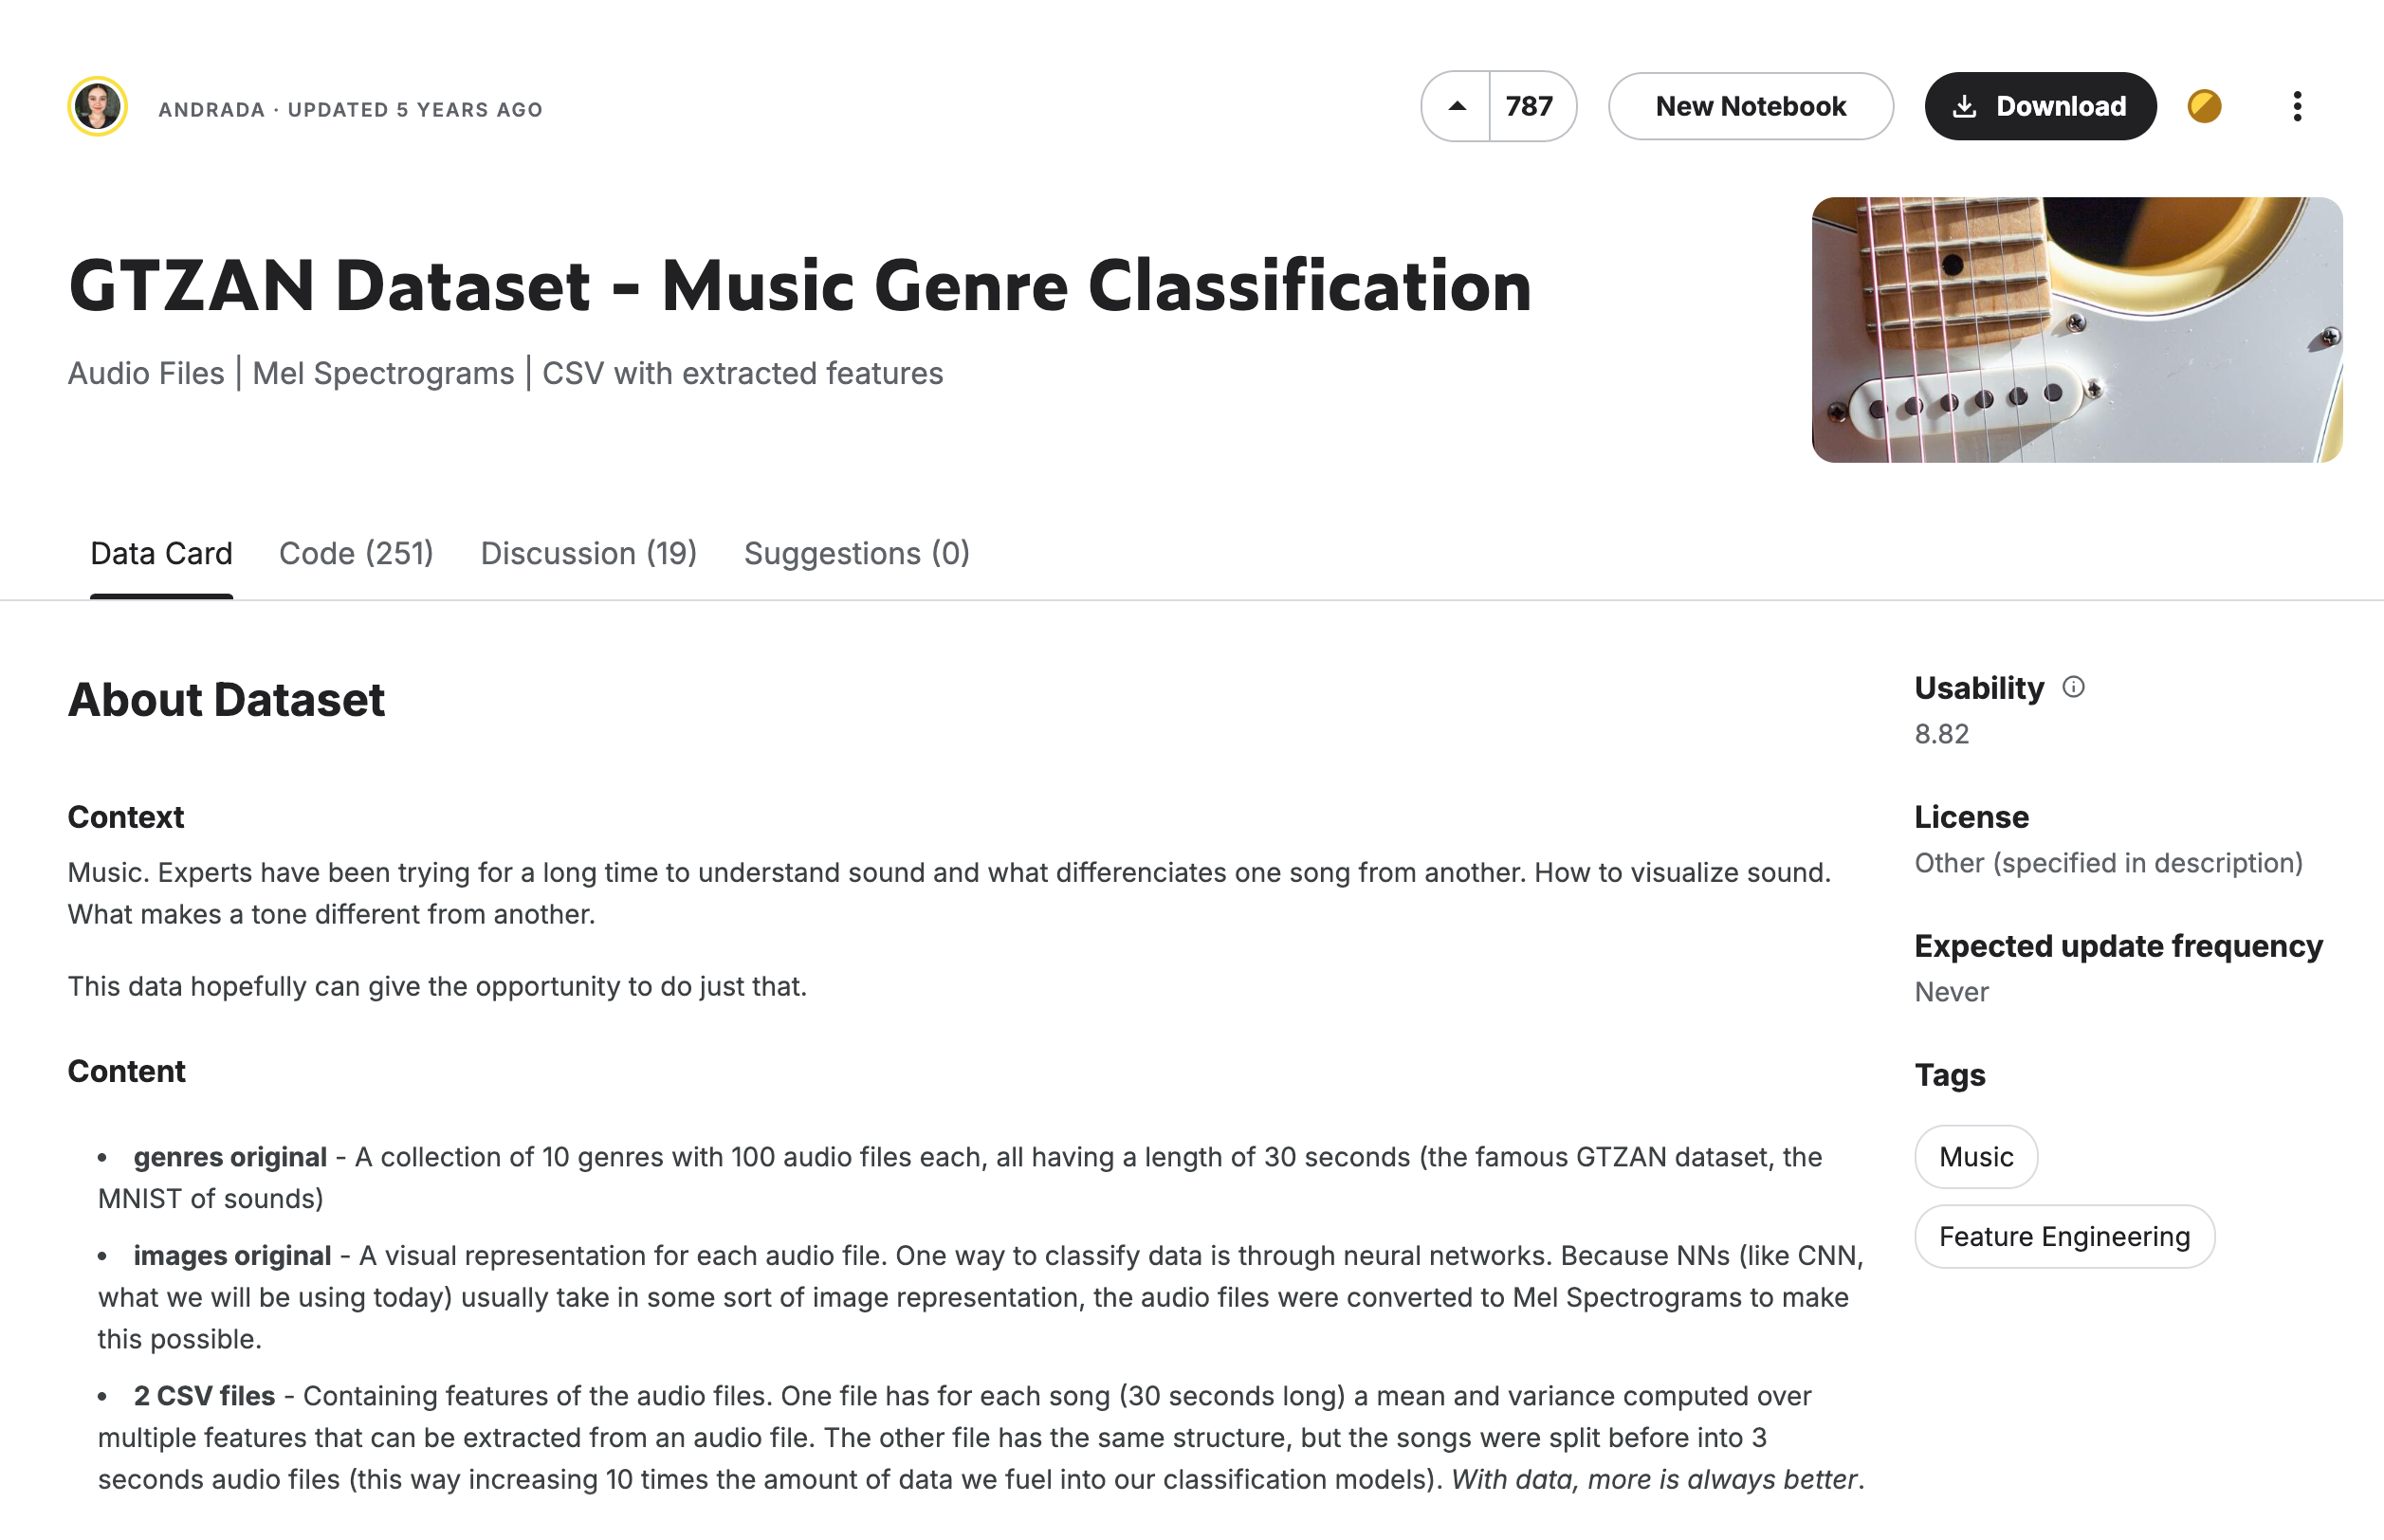
The dataset used in this task is GTZAN, a commonly used public dataset in music genre recognition research. The GTZAN dataset contains 1000 audio clips, each 30 seconds long, divided into 10 music genres: Blues, Classical, Country, Disco, Hip Hop, Jazz, Metal, Pop, Reggae, and Rock, with 100 clips per genre.

The GTZAN dataset was collected from various sources between 2000-2001, including personal CDs, radio, and microphone recordings, representing sounds under various recording conditions.
Dataset Download Method (1.4GB in size):
- Baidu Netdisk Download: Link: https://pan.baidu.com/s/14CTI_9MD1vXCqyVxmAbeMw?pwd=1a9e Extraction Code: 1a9e
- Download via Kaggle: https://www.kaggle.com/datasets/andradaolteanu/gtzan-dataset-music-genre-classification
- Download via Hyper AI website using BT seed: https://hyper.ai/cn/datasets/32001
Note: There is one corrupted audio in the dataset, which has been removed in the Baidu Netdisk version.
After downloading, unzip it to the project root directory.
4. Generate Dataset CSV File
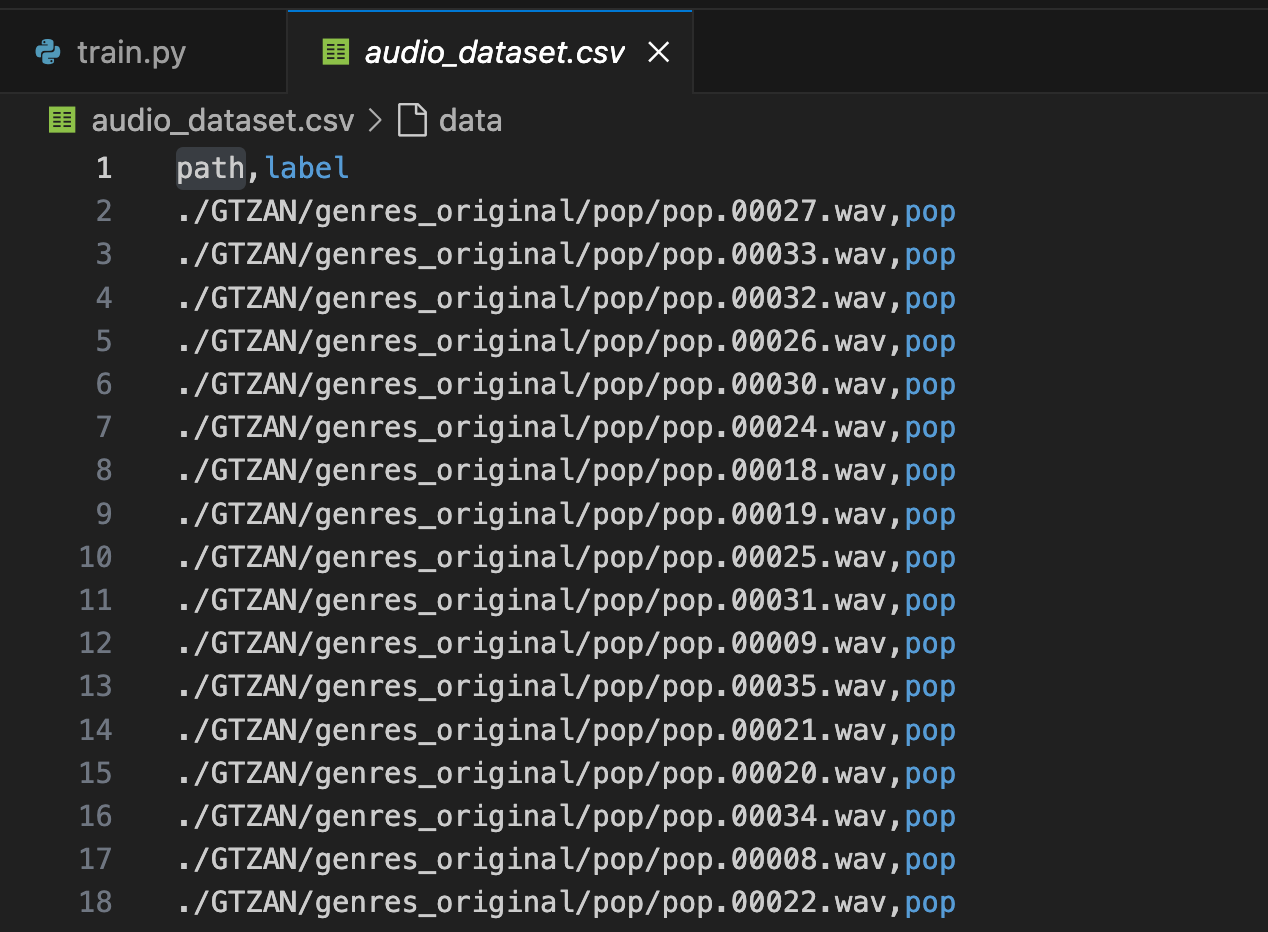
We will process the audio file paths and corresponding labels in the dataset into an audio_dataset.csv file, where the first column is the file path and the second column is the label:
(This part is not executed first, it will be included in the complete code)
import os
import pandas as pd

def create_dataset_csv():
    # Dataset root directory
    data_dir = './GTZAN/genres_original'
    data = []

    # Traverse all subdirectories
    for label in os.listdir(data_dir):
        label_dir = os.path.join(data_dir, label)
        if os.path.isdir(label_dir):
            # Traverse all wav files in the subdirectory
            for audio_file in os.listdir(label_dir):
                if audio_file.endswith('.wav'):
                    audio_path = os.path.join(label_dir, audio_file)
                    data.append([audio_path, label])

    # Create DataFrame and save as CSV
    df = pd.DataFrame(data, columns=['path', 'label'])
    df.to_csv('audio_dataset.csv', index=False)
    return df

# Generate or load dataset CSV file
if not os.path.exists('audio_dataset.csv'):
    df = create_dataset_csv()
else:
    df = pd.read_csv('audio_dataset.csv')
After processing, you will see an audio_dataset.csv file in the root directory:

5. Configure Training Tracking Tool SwanLab
SwanLab is an open-source, lightweight AI experiment tracking tool that provides a platform for tracking, comparing, and collaborating on experiments. SwanLab offers friendly APIs and a beautiful interface, combining hyperparameter tracking, metric recording, online collaboration, experiment link sharing, and more, allowing you to quickly track AI experiments, visualize processes, record hyperparameters, and share them with your peers.

Configuring SwanLab is simple:
- Register an account: https://swanlab.cn
- After installing swanlab (pip install swanlab), log in:
swanlab loginWhen prompted to enter the API Key, go to the settings page, copy the API Key, paste it, and press Enter.

6. Complete Code
Directory structure before starting training:
|--- train.py
|--- GTZAN
train.py does the following:
- Generate the dataset CSV file.
- Load the dataset and ResNet18 model (pre-trained on ImageNet).
- Train for 20 epochs, with training and evaluation for each epoch.
- Record loss and accuracy, as well as the learning rate changes, and visualize them in SwanLab.
train.py:
import torch
import torch.nn as nn
import torch.optim as optim
import torchaudio
import torchvision.models as models
from torch.utils.data import Dataset, DataLoader
import os
import pandas as pd
from sklearn.model_selection import train_test_split
import swanlab

def create_dataset_csv():
    # Dataset root directory
    data_dir = './GTZAN/genres_original'
    data = []

    # Traverse all subdirectories
    for label in os.listdir(data_dir):
        label_dir = os.path.join(data_dir, label)
        if os.path.isdir(label_dir):
            # Traverse all wav files in the subdirectory
            for audio_file in os.listdir(label_dir):
                if audio_file.endswith('.wav'):
                    audio_path = os.path.join(label_dir, audio_file)
                    data.append([audio_path, label])

    # Create DataFrame and save as CSV
    df = pd.DataFrame(data, columns=['path', 'label'])
    df.to_csv('audio_dataset.csv', index=False)
    return df

# Custom dataset class
class AudioDataset(Dataset):
    def __init__(self, df, resize, train_mode=True):
        self.audio_paths = df['path'].values
        # Convert labels to numerical values
        self.label_to_idx = {label: idx for idx, label in enumerate(df['label'].unique())}
        self.labels = [self.label_to_idx[label] for label in df['label'].values]
        self.resize = resize
        self.train_mode = train_mode  # Add training mode flag
    def __len__(self):
        return len(self.audio_paths)

    def __getitem__(self, idx):
        # Load audio file
        waveform, sample_rate = torchaudio.load(self.audio_paths[idx])

        # Convert audio to Mel spectrogram
        transform = torchaudio.transforms.MelSpectrogram(
            sample_rate=sample_rate,
            n_fft=2048,
            hop_length=640,
            n_mels=128
        )
        mel_spectrogram = transform(waveform)

        # Ensure values are within a reasonable range
        mel_spectrogram = torch.clamp(mel_spectrogram, min=0)

        # Convert to 3-channel image format (to fit ResNet)
        mel_spectrogram = mel_spectrogram.repeat(3, 1, 1)

        # Ensure consistent size
        resize = torch.nn.AdaptiveAvgPool2d((self.resize, self.resize))
        mel_spectrogram = resize(mel_spectrogram)

        return mel_spectrogram, self.labels[idx]

# Modify ResNet model
class AudioClassifier(nn.Module):
    def __init__(self, num_classes):
        super(AudioClassifier, self).__init__()
        # Load pre-trained ResNet
        self.resnet = models.resnet18(weights=models.ResNet18_Weights.IMAGENET1K_V1)
        # Modify the final fully connected layer
        self.resnet.fc = nn.Linear(512, num_classes)

    def forward(self, x):
        return self.resnet(x)

# Training function
def train_model(model, train_loader, val_loader, criterion, optimizer, num_epochs, device):

    for epoch in range(num_epochs):
        model.train()
        running_loss = 0.0
        correct = 0
        total = 0

        for i, (inputs, labels) in enumerate(train_loader):
            inputs, labels = inputs.to(device), labels.to(device)

            outputs = model(inputs)
            loss = criterion(outputs, labels)

            loss.backward()

            optimizer.step()
            optimizer.zero_grad()

            running_loss += loss.item()

            _, predicted = outputs.max(1)
            total += labels.size(0)
            correct += predicted.eq(labels).sum().item()

        train_loss = running_loss/len(train_loader)
        train_acc = 100.*correct/total

        # Validation phase
        model.eval()
        val_loss = 0.0
        correct = 0
        total = 0
        with torch.no_grad():
            for inputs, labels in val_loader:
                inputs, labels = inputs.to(device), labels.to(device)
                outputs = model(inputs)
                loss = criterion(outputs, labels)

                val_loss += loss.item()
                _, predicted = outputs.max(1)
                total += labels.size(0)
                correct += predicted.eq(labels).sum().item()

        val_loss = val_loss/len(val_loader)
        val_acc = 100.*correct/total

        current_lr = optimizer.param_groups[0]['lr']

        # Record training and validation metrics
        swanlab.log({
            "train/loss": train_loss,
            "train/acc": train_acc,
            "val/loss": val_loss,
            "val/acc": val_acc,
            "train/epoch": epoch,
            "train/lr": current_lr
        })

        print(f'Epoch {epoch+1}:')
        print(f'Train Loss: {train_loss:.4f} | Train Acc: {train_acc:.2f}%')
        print(f'Val Loss: {val_loss:.4f} | Val Acc: {val_acc:.2f}%')
        print(f'Learning Rate: {current_lr:.6f}')

# Main function
def main():
    # Set device
    device = torch.device("cuda" if torch.cuda.is_available() else "cpu")

    run = swanlab.init(
        project="PyTorch_Audio_Classification-simple",
        experiment_name="resnet18",
        config={
            "batch_size": 16,
            "learning_rate": 1e-4,
            "num_epochs": 20,
            "resize": 224,
        },
    )

    # Generate or load dataset CSV file
    if not os.path.exists('audio_dataset.csv'):
        df = create_dataset_csv()
    else:
        df = pd.read_csv('audio_dataset.csv')

    # Split training and validation sets
    train_df = pd.DataFrame()
    val_df = pd.DataFrame()

    for label in df['label'].unique():
        label_df = df[df['label'] == label]
        label_train, label_val = train_test_split(label_df, test_size=0.2, random_state=42)
        train_df = pd.concat([train_df, label_train])
        val_df = pd.concat([val_df, label_val])

    # Create dataset and data loader
    train_dataset = AudioDataset(train_df, resize=run.config.resize, train_mode=True)
    val_dataset = AudioDataset(val_df, resize=run.config.resize, train_mode=False)

    train_loader = DataLoader(train_dataset, batch_size=run.config.batch_size, shuffle=True)
    val_loader = DataLoader(val_dataset, batch_size=1, shuffle=False)

    # Create model
    num_classes = len(df['label'].unique())  # Set based on actual classification number
    print("num_classes", num_classes)
    model = AudioClassifier(num_classes).to(device)

    # Define loss function and optimizer
    criterion = nn.CrossEntropyLoss()
    optimizer = optim.Adam(model.parameters(), lr=run.config.learning_rate)

    # Train model
    train_model(model, train_loader, val_loader, criterion, optimizer, num_epochs=run.config.num_epochs, device=device)

if __name__ == "__main__":
    main()
If you see the following output, training has started:

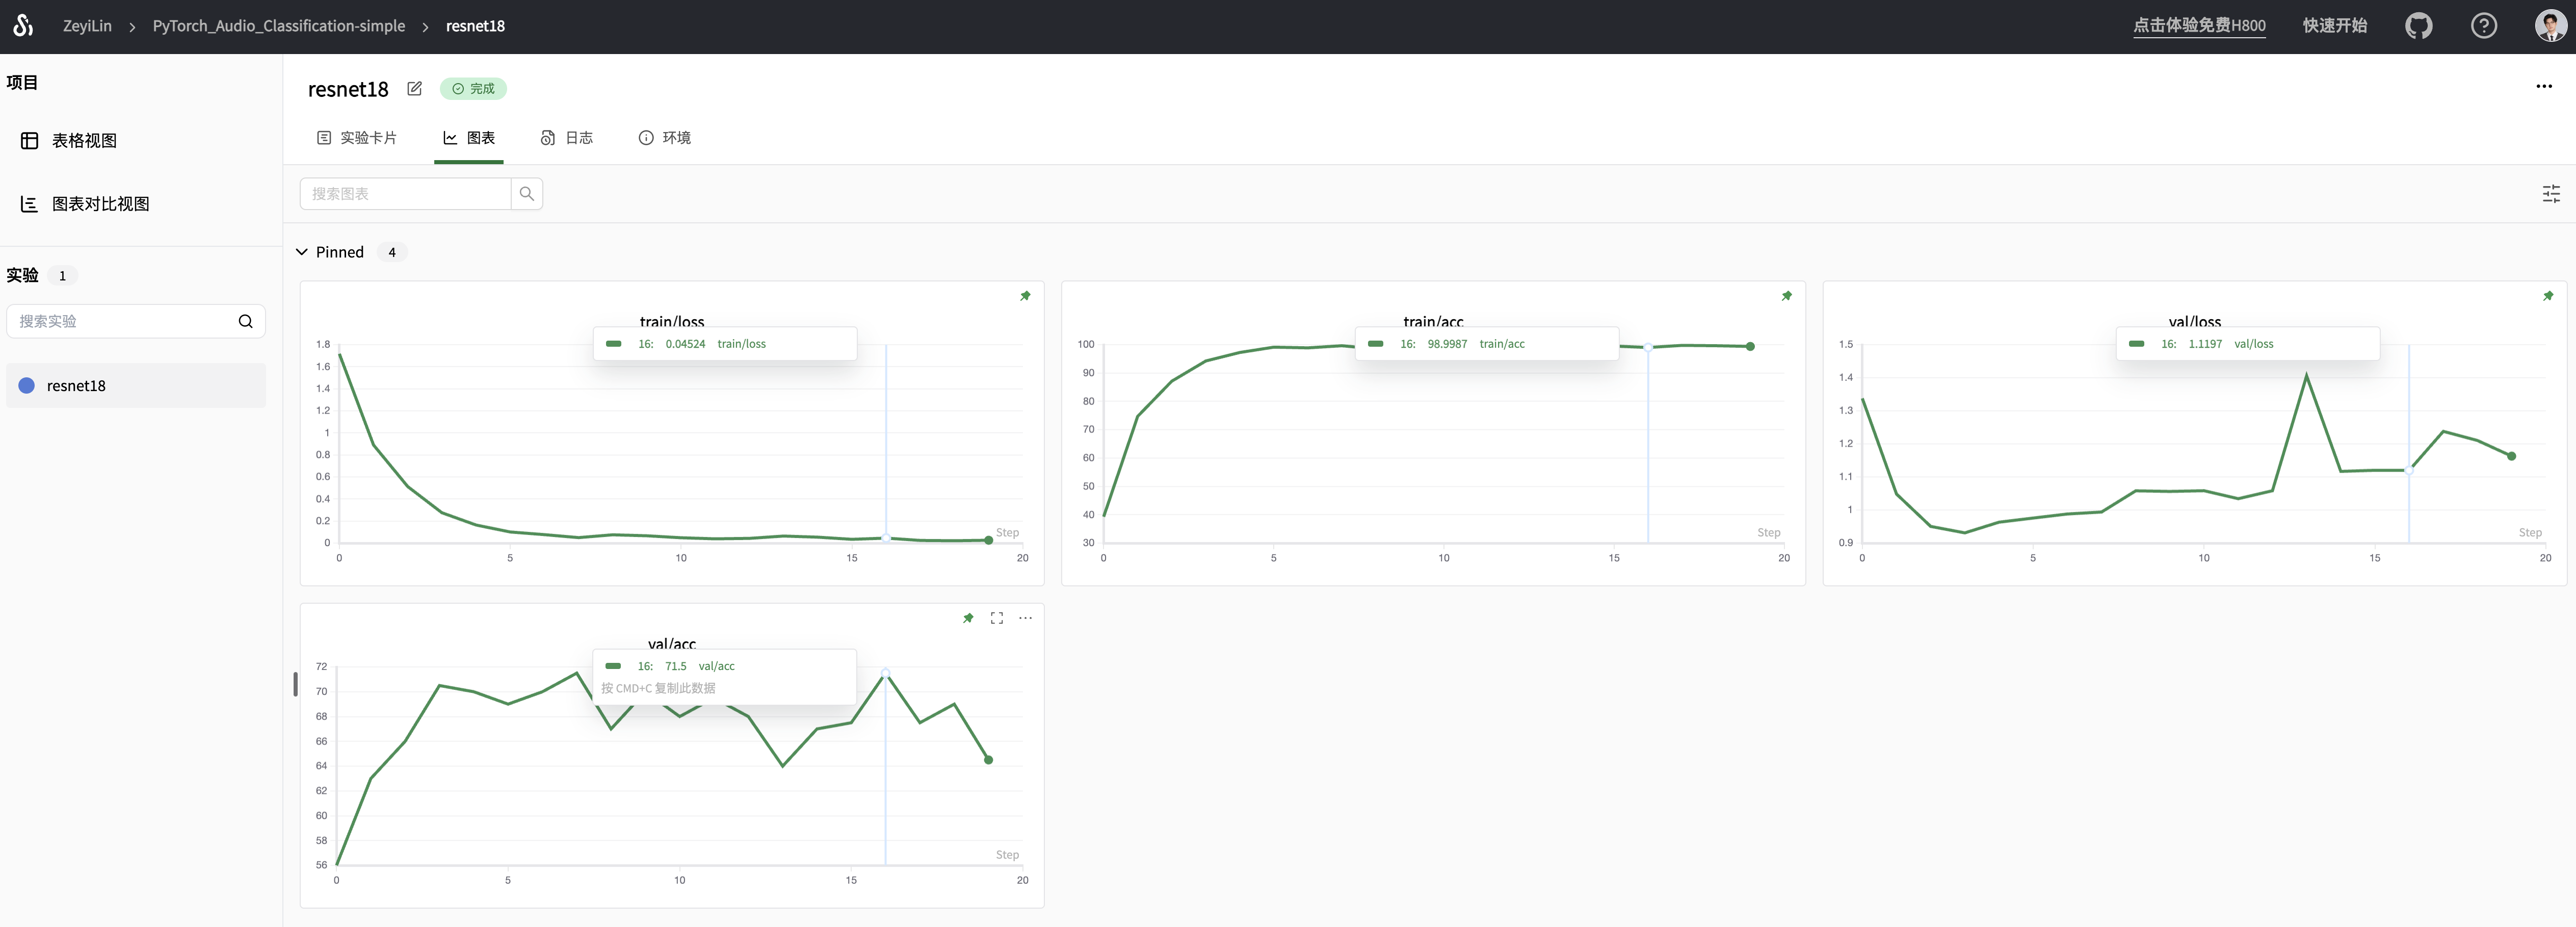
Visit the printed SwanLab link to see the entire training process:

You can see that the ResNet18 model, without any strategies, achieves 99.5% accuracy on the training set and a maximum of 71.5% accuracy on the validation set. The validation loss starts to rise after the 3rd epoch, showing a trend of "overfitting."
7. Advanced Code
Below is the experiment where I achieved 87.5% validation accuracy. The specific strategies include:
- Switching the model to resnext101_32x8d.
- Increasing the Mel spectrogram resize to 512. 3