Pretraining Your Own Large Model from Scratch
Large Language Models (LLMs) are deep learning models trained on vast amounts of text data to generate natural language text or understand language text meanings.

While there are numerous tutorials online about transformer theory and fine-tuning large language models, few explain the pretraining process. This article provides a hands-on guide to pretraining a large language model from scratch using a Wikipedia dataset, along with instructions on how to use SwanLab Launch to leverage cloud GPUs for free.
- Complete tutorial code: GitHub
- Experiment logs: SwanLab
- Dataset download: Baidu Netdisk (j8ee), Huggingface
Environment Setup
First, the project recommends using Python 3.10. The required Python packages are as follows:
swanlab
transformers
datasets
accelerate
Install them with the following command:
pip install swanlab transformers datasets accelerate modelscopeDownloading the Dataset
This tutorial uses a Chinese Wikipedia dataset. Ideally, the pretraining dataset should be as diverse and large as possible; additional datasets will be added later.

Huggingface link: wikipedia-zh-cn
Baidu Netdisk download link: Baidu Netdisk (j8ee)
After downloading the wikipedia-zh-cn-20240820.json file, place it in the project directory under the ./WIKI_CN/ folder.
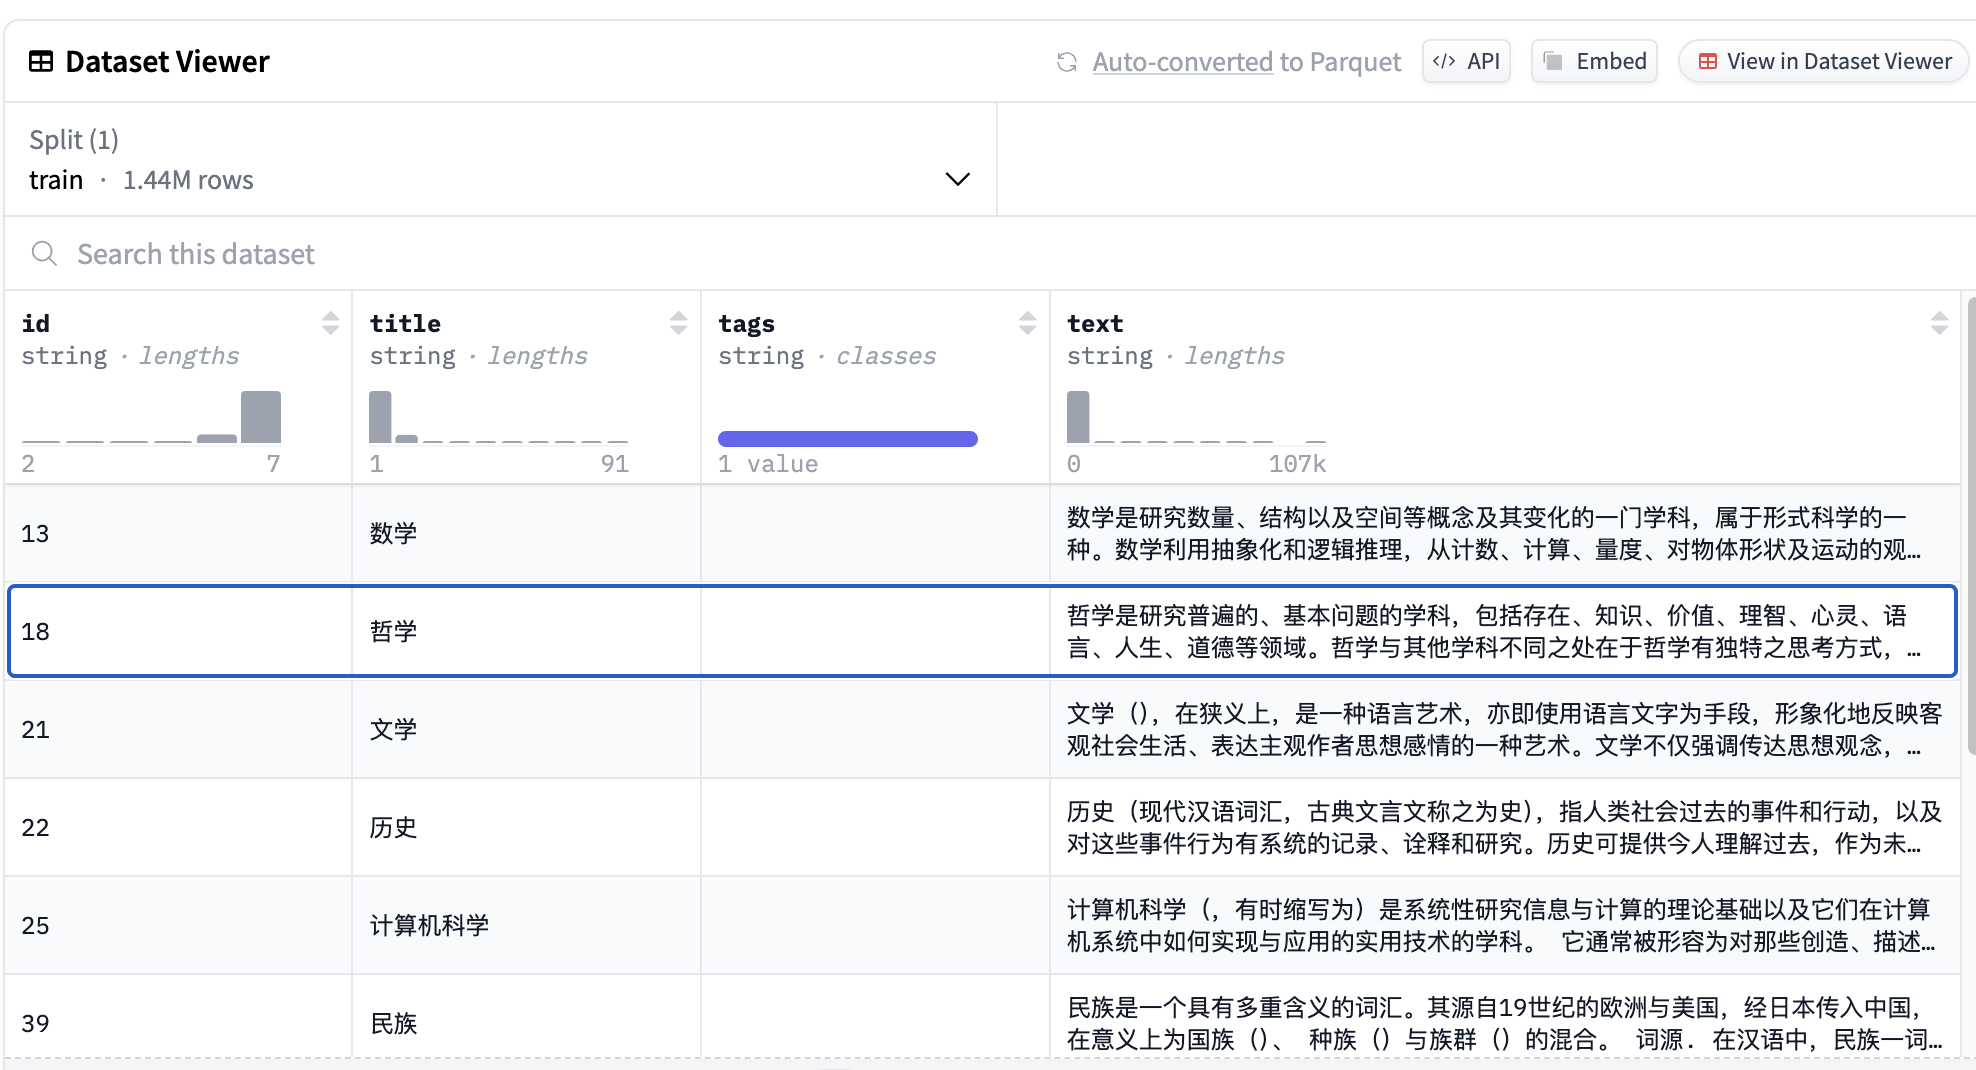
The dataset file is approximately 1.99GB in size, containing 1.44 million entries. Although the dataset includes article titles, they are not used in the pretraining phase. Sample text from the dataset:
Mathematics is the study of quantity, structure, and space, and their changes, and is a discipline of formal science. Mathematics uses abstraction and logical reasoning to develop concepts from counting, calculating, measuring, and observing the shapes and motions of objects. Mathematicians expand these concepts...Load the dataset using the 🤗Huggingface Datasets library:
from datasets import load_dataset

ds = load_dataset("fjcanyue/wikipedia-zh-cn")
If using the JSON file downloaded from Baidu Netdisk, load it with the following code:
raw_datasets = datasets.load_dataset(
    "json", data_files="data/wikipedia-zh-cn-20240820.json"
)

raw_datasets = raw_datasets["train"].train_test_split(test_size=0.1, seed=2333)
print("dataset info")
print(raw_datasets)
Building Your Own Large Language Model
This tutorial uses the 🤗Huggingface Transformers library to build your own large model.
Since the goal is to train a Chinese large model, we reference the tokenizer and model architecture of Qwen-2 and make minor adjustments to make the model smaller and easier to train.
As direct access to Huggingface is restricted in China, it is recommended to use ModelScope to download the model configuration files and checkpoints locally. Run the following code:
import modelscope

modelscope.AutoConfig.from_pretrained("Qwen/Qwen2-0.5B").save_pretrained(
    "Qwen2-0.5B"
)
modelscope.AutoTokenizer.from_pretrained("Qwen/Qwen2-0.5B").save_pretrained(
    "Qwen2-0.5B"
)
Configure the parameters and modify the number of attention heads, model layers, and intermediate layer sizes to control the model to approximately 120M parameters (similar to GPT-2).
import transformers

tokenizer = transformers.AutoTokenizer.from_pretrained("./Qwen2-0.5B")   # Use Qwen-2's tokenizer
config = transformers.AutoConfig.from_pretrained(
        "./Qwen2-0.5B",
        vocab_size=len(tokenizer),
        hidden_size=512,
        intermediate_size=2048,
        num_attention_heads=8,
        num_hidden_layers=12,
        n_ctx=context_length,
        bos_token_id=tokenizer.bos_token_id,
        eos_token_id=tokenizer.eos_token_id,
    )
print("Model Config:")
print(config)
Initialize the model using the Transformers library:
model = transformers.Qwen2ForCausalLM(config)
model_size = sum(t.numel() for t in model.parameters())
print(f"Model Size: {model_size/1000**2:.1f}M parameters")
Setting Training Parameters
Set the pretraining hyperparameters:
args = transformers.TrainingArguments(
    output_dir="checkpoints",
    per_device_train_batch_size=24,  # Batch size per GPU for training
    per_device_eval_batch_size=24,  # Batch size per GPU for evaluation
    eval_strategy="steps",
    eval_steps=5_000,
    logging_steps=500,
    gradient_accumulation_steps=12,  # Total gradient accumulation steps
    num_train_epochs=2, # Number of training epochs
    weight_decay=0.1,
    warmup_steps=1_000,
    optim="adamw_torch",  # Optimizer using AdamW
    lr_scheduler_type="cosine",  # Learning rate decay strategy
    learning_rate=5e-4,  # Base learning rate
    save_steps=5_000,
    save_total_limit=10,
    bf16=True,  # Enable bf16 training, replace with fp16=True for non-Ampere architecture GPUs
)
print("Train Args:")
print(args)
Initializing Training + Logging with SwanLab
Use the built-in training from Transformers and integrate SwanLab for visualization and logging:
from swanlab.integration.transformers import SwanLabCallback
trainer = transformers.Trainer(
    model=model,
    tokenizer=tokenizer,
    args=args,
    data_collator=data_collator,
    train_dataset=tokenized_datasets["train"],
    eval_dataset=tokenized_datasets["test"],
    callbacks=[SwanLabCallback()],
)
trainer.train()
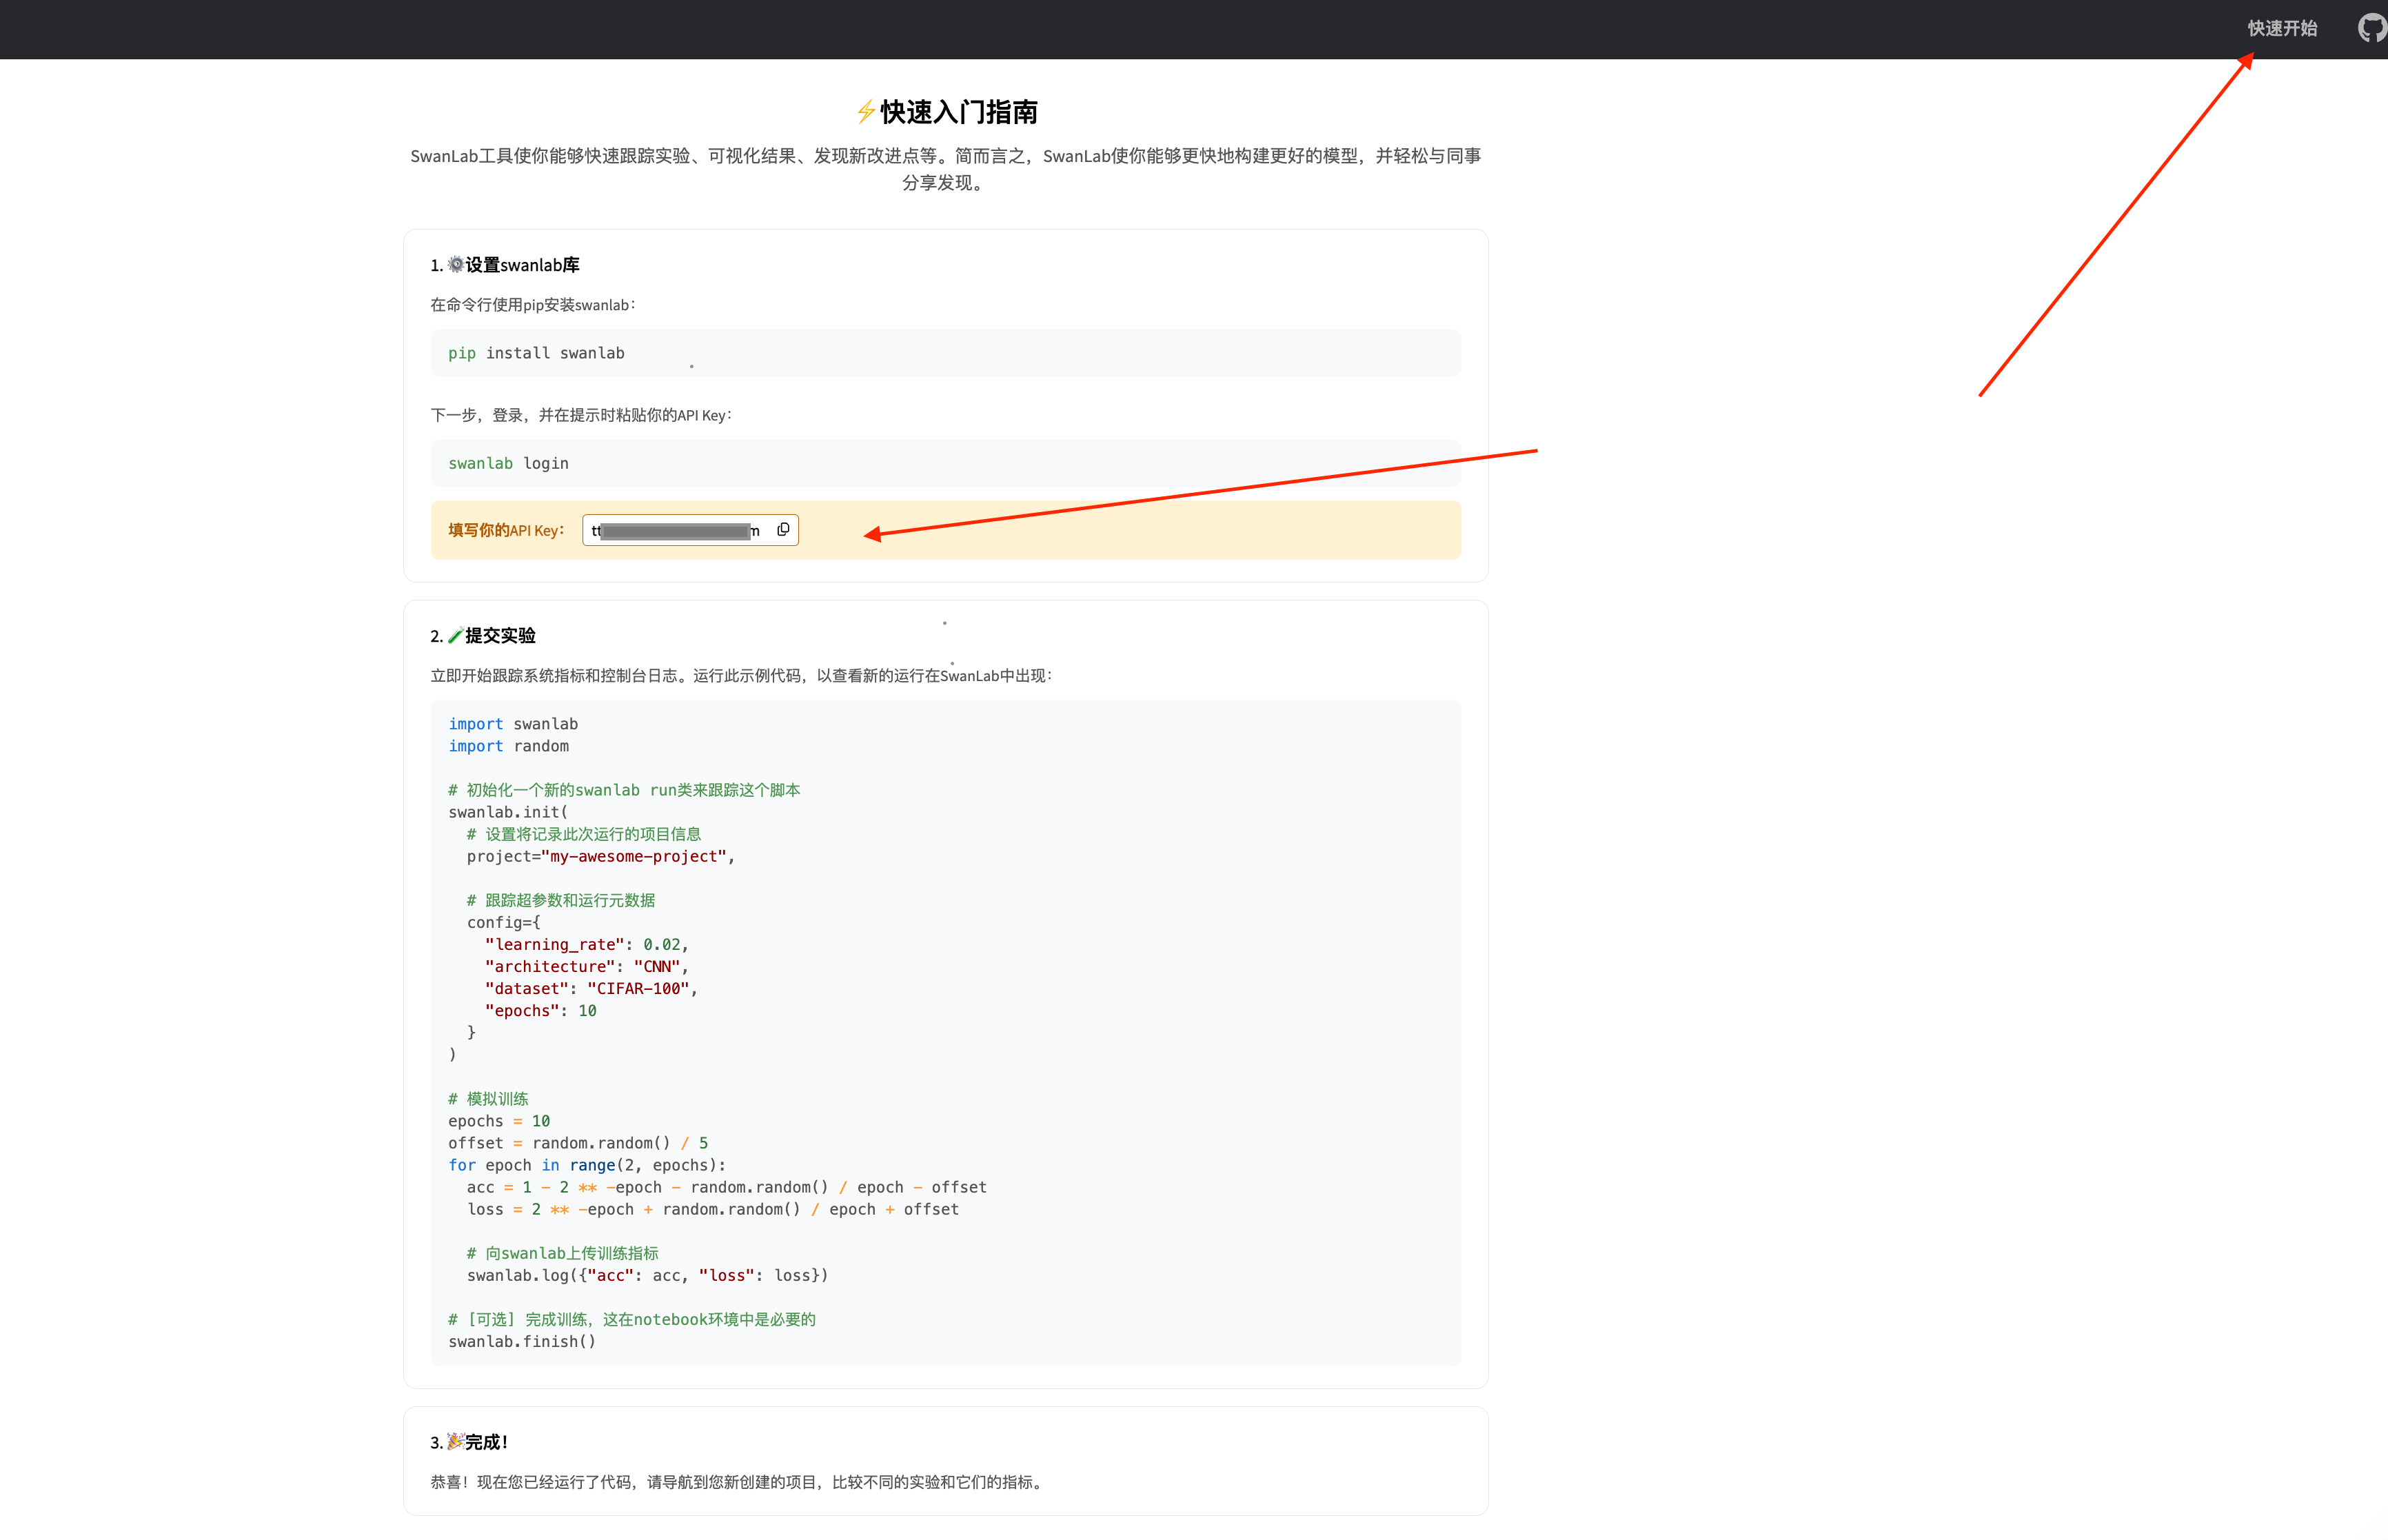
If this is your first time using SwanLab, log in to the SwanLab website https://swanlab.cn/, register, and find your key as shown below:

Then, enter the following command in the terminal:
swanlab loginYou will be prompted to enter your key. Paste the key (note that the key will not be displayed in the terminal) to complete the configuration. The result should look like this:

Complete Code
Project directory structure:
|---data\
|------wikipedia-zh-cn-20240820.json    # Dataset placed in the data folder
|--- pretrain.py
pretrain.py code:
import datasets
import transformers
import swanlab
from swanlab.integration.transformers import SwanLabCallback
import modelscope

def main():
    # using swanlab to save log
    swanlab.init("WikiLLM")

    # load dataset
    raw_datasets = datasets.load_dataset(
        "json", data_files="/data/WIKI_CN/wikipedia-zh-cn-20240820.json"
    )

    raw_datasets = raw_datasets["train"].train_test_split(test_size=0.1, seed=2333)
    print("dataset info")
    print(raw_datasets)

    # load tokenizers
    # Because direct access to HuggingFace is restricted in China, use ModelScope to download the model configuration files and Tokenizer locally
    modelscope.AutoConfig.from_pretrained("Qwen/Qwen2-0.5B").save_pretrained(
        "Qwen2-0.5B"
    )
    modelscope.AutoTokenizer.from_pretrained("Qwen/Qwen2-0.5B").save_pretrained(
        "Qwen2-0.5B"
    )
    context_length = 512  # use a small context length
    # tokenizer = transformers.AutoTokenizer.from_pretrained("Qwen/Qwen2-0.5B")
    tokenizer = transformers.AutoTokenizer.from_pretrained(
        "./Qwen2-0.5B"
    )  # download from local

    # preprocess dataset
    def tokenize(element):
        outputs = tokenizer(
            element["text"],
            truncation=True,
            max_length=context_length,
            return_overflowing_tokens=True,
            return_length=True,
        )
        input_batch = []
        for length, input_ids in zip(outputs["length"], outputs["input_ids"]):
            if length == context_length:
                input_batch.append(input_ids)
        return {"input_ids": input_batch}

    tokenized_datasets = raw_datasets.map(
        tokenize, batched=True, remove_columns=raw_datasets["train"].column_names
    )
    print("tokenize dataset info")
    print(tokenized_datasets)
    tokenizer.pad_token = tokenizer.eos_token
    data_collator = transformers.DataCollatorForLanguageModeling(tokenizer, mlm=False)

    # prepare a model from scratch
    config = transformers.AutoConfig.from_pretrained(
        "./Qwen2-0.5B",
        vocab_size=len(tokenizer),
        hidden_size=512,
        intermediate_size=2048,
        num_attention_heads=8,
        num_hidden_layers=12,
        n_ctx=context_length,
        bos_token_id=tokenizer.bos_token_id,
        eos_token_id=tokenizer.eos_token_id,
    )
    model = transformers.Qwen2ForCausalLM(config)
    model_size = sum(t.numel() for t in model.parameters())
    print("Model Config:")
    print(config)
    print(f"Model Size: {model_size/1000**2:.1f}M parameters")

    # train
    args = transformers.TrainingArguments(
        output_dir="WikiLLM",
        per_device_train_batch_size=32,  # Batch size per GPU for training
        per_device_eval_batch_size=32,  # Batch size per GPU for evaluation
        eval_strategy="steps",
        eval_steps=5_00,
        logging_steps=50,
        gradient_accumulation_steps=8,  # Total gradient accumulation steps
        num_train_epochs=2,  # Number of training epochs
        weight_decay=0.1,
        warmup_steps=2_00,
        optim="adamw_torch",  # Optimizer using AdamW
        lr_scheduler_type="cosine",  # Learning rate decay strategy
        learning_rate=5e-4,  # Base learning rate
        save_steps=5_00,
        save_total_limit=10,
        bf16=True,  # Enable bf16 training, replace with fp16=True for non-Ampere architecture GPUs
    )
    print("Train Args:")
    print(args)
    # enjoy training
    trainer = transformers.Trainer(
        model=model,
        tokenizer=tokenizer,
        args=args,
        data_collator=data_collator,
        train_dataset=tokenized_datasets["train"],
        eval_dataset=tokenized_datasets["test"],
        callbacks=[SwanLabCallback()],
    )
    trainer.train()

    # save model
    model.save_pretrained("./WikiLLM/Weight")  # Save model path

    # generate
    pipe = transformers.pipeline("text-generation", model=model, tokenizer=tokenizer)
    print("GENERATE:", pipe("人工智能", num_return_sequences=1)[0]["generated_text"])
    prompts = ["牛顿", "北京市", "亚洲历史"]
    examples = []
    for i in range(3):
        # Generate data based on prompts
        text = pipe(prompts[i], num_return_sequences=1)[0]["generated_text"]
        text = swanlab.Text(text)
        examples.append(text)
    swanlab.log({"Generate": examples})


if __name__ == "__main__":
    main()
Training Results Demonstration
Run the following command:
python pretrain.pyYou will see the training logs as shown below. Since the training takes a long time, it is recommended to use tmux to hold the training task.

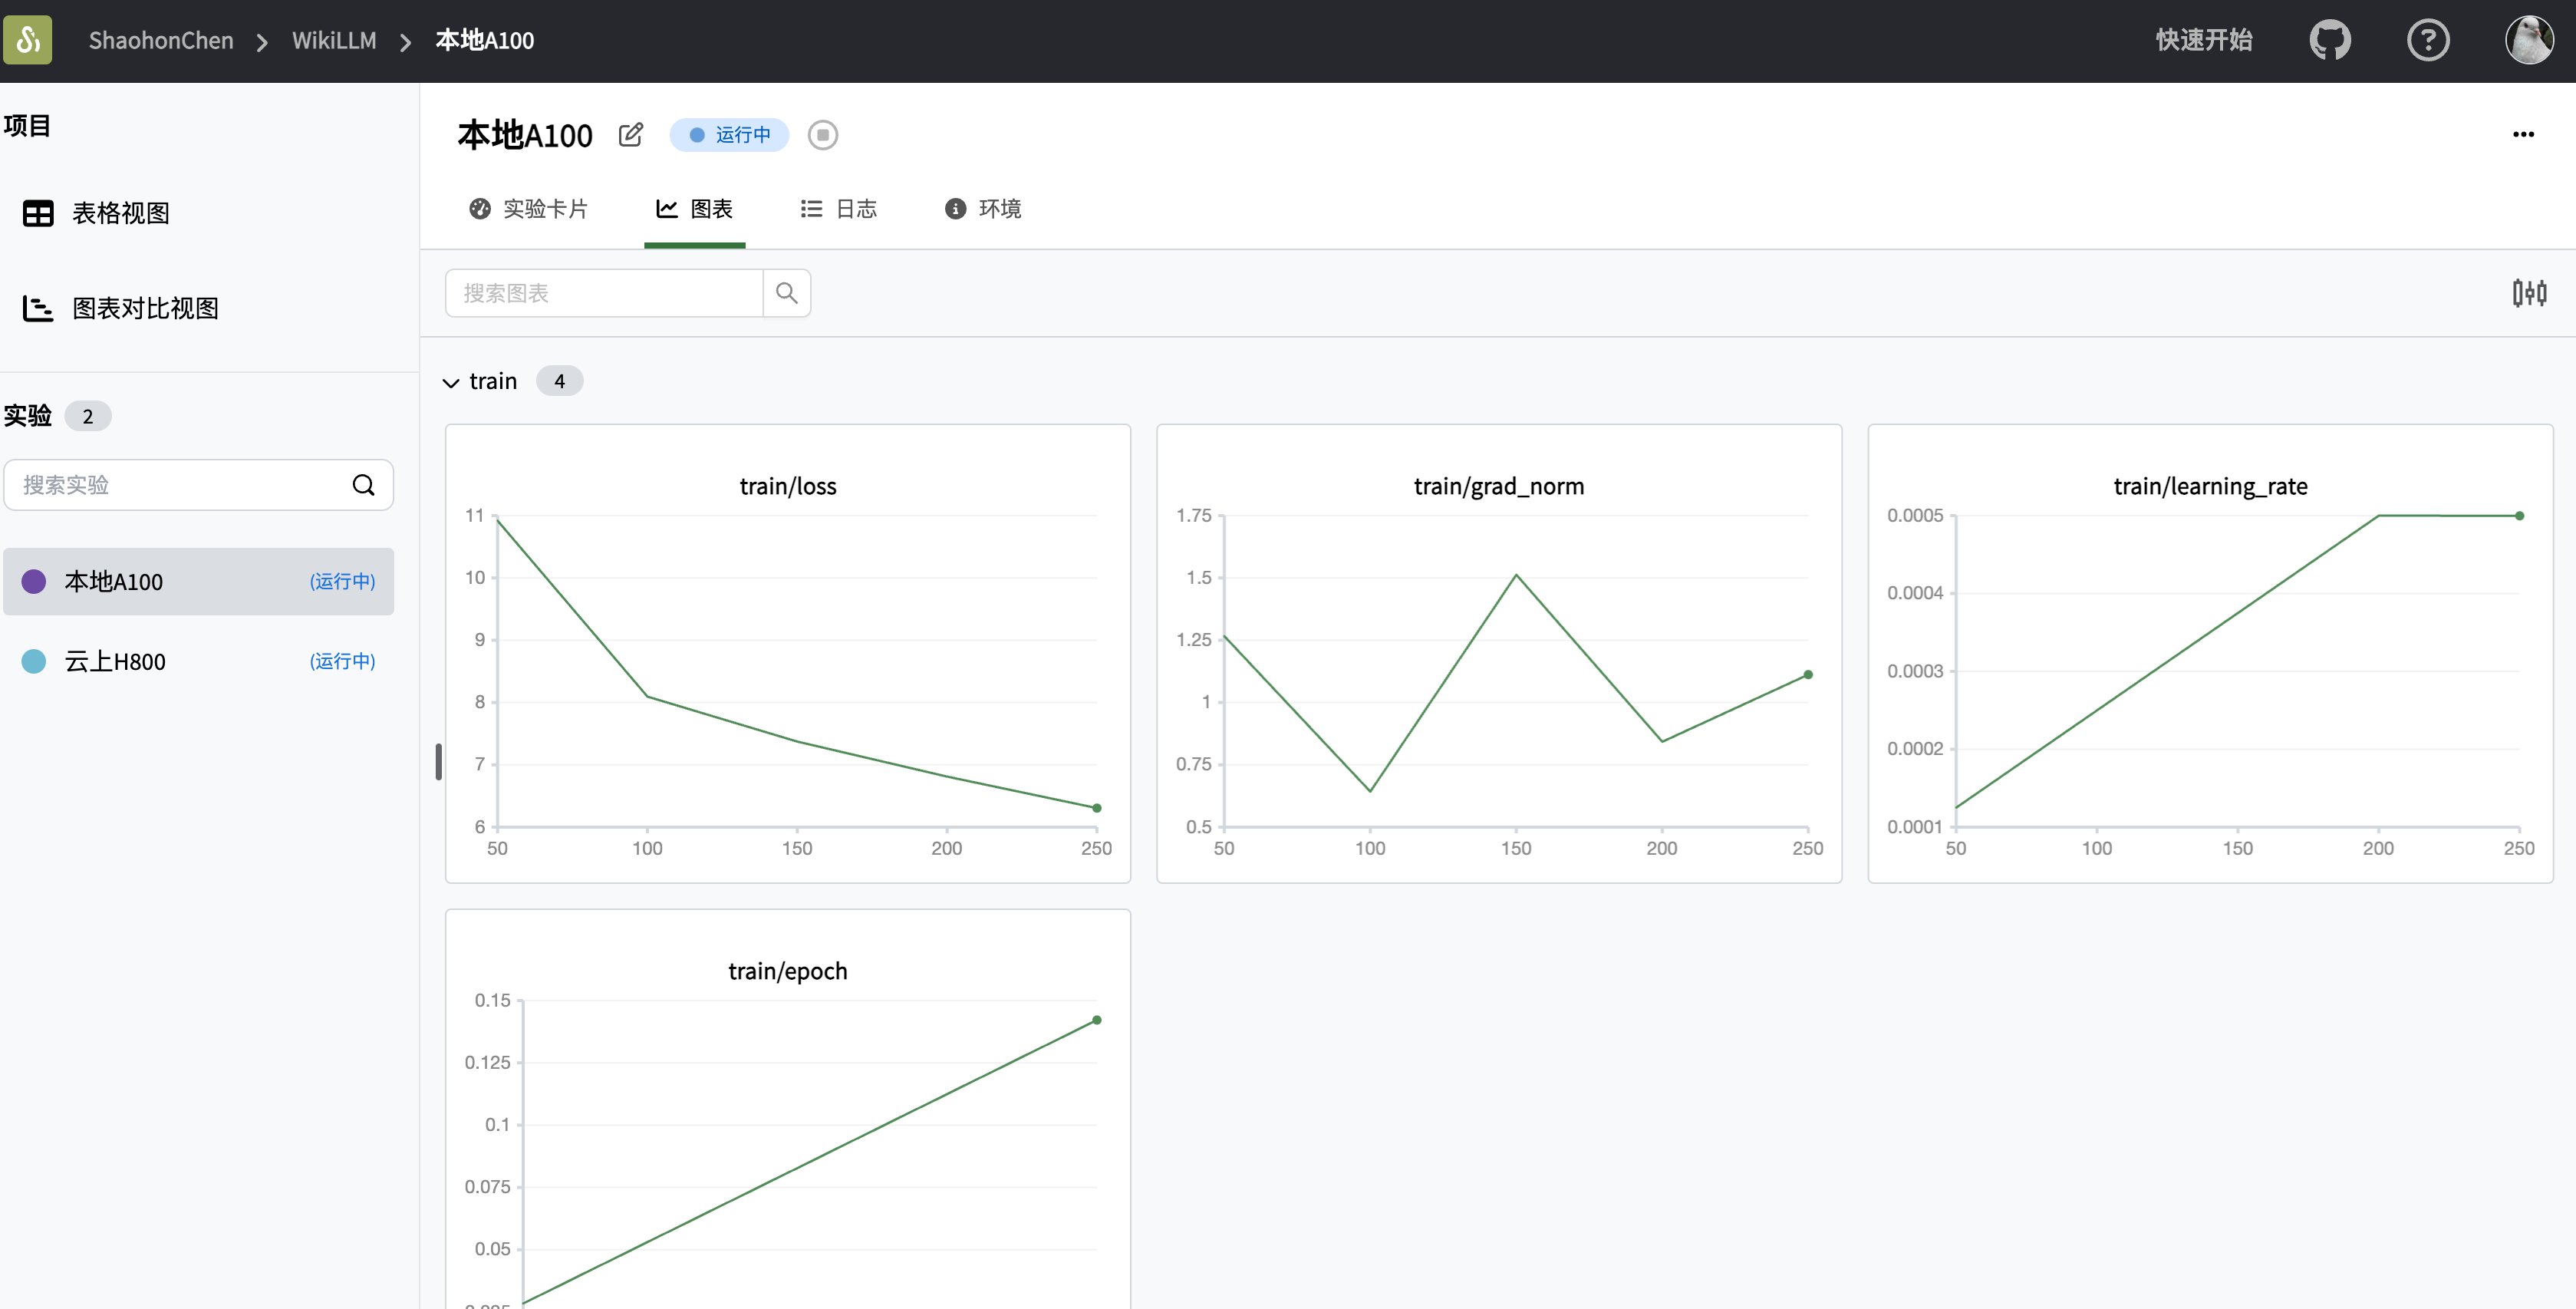
You can view the final training results on SwanLab:

Using the Trained Model for Inference
Generate content starting with "人工智能" using the following code:
pipe = transformers.pipeline("text-generation", model=model, tokenizer=tokenizer)
print("GENERATE:", pipe("人工智能", num_return_sequences=1)[0]["generated_text"])
Inference results are as follows:
(The model is still training; you can check the training progress and inference results in real-time at https://swanlab.cn/@ShaohonChen/WikiLLM/overview)