MMEngine
MMEngine is a deep learning training framework developed by the OpenMMLab community, designed specifically for deep learning research and development. MMEngine provides an efficient, flexible, and user-friendly way to build, train, and test deep learning models, especially in the field of computer vision. Its goal is to simplify the workflow for researchers and developers in deep learning projects and improve their development efficiency.

MMEngine implements the next-generation training architecture for OpenMMLab algorithm libraries, providing a unified execution foundation for over 30 algorithm libraries in OpenMMLab. Its core components include the training engine, evaluation engine, and module management.
SwanLab integrates the SwanlabVisBackend designed specifically for MMEngine into MMEngine, which can be used to log training and evaluation metrics, record experiment configurations, and log images.
Integration with Other MM Ecosystems
Compatibility Notes for MMEngine Series Frameworks
Frameworks using MMEngine can all use the following methods to introduce SwanLab. For example, MM official frameworks MMDetection, MMSegmentation, etc., as well as training frameworks implemented based on MMEngine.
You can check out which excellent frameworks are available under the OpenMMLab official GitHub account.
Some frameworks, such as Xtuner, are not fully compatible with MMEngine and require some simple modifications. You can refer to SwanLab's Xtuner Integration to see how to use SwanLab in Xtuner.
There are two methods to introduce SwanLab for experiment visualization tracking using MMEngine:
Method 1: Pass Visualizer to Training Script and Start Training
INFO
You can refer to the MMEngine 15-minute tutorial to adapt your training code to MMEngine.
Ensure you have installed SwanLab, or use pip install -U swanlab to install the latest version.
If you follow the official example and use MMEngine as your training framework, make the following changes in your training script:
- Add SwanlabVisBackend when initializing
visualizer. - Pass
visualizerwhen initializingrunner:
from mmengine.visualization import Visualizer
from mmengine.runner import Runner

from swanlab.integration.mmengine import SwanlabVisBackend
...
# Initialize SwanLab
swanlab_vis_backend = SwanlabVisBackend(init_kwargs={})  # init args can be found in https://docs.swanlab.cn/zh/guide_cloud/integration/integration-mmengine.html
# Initialize mmengine's Visualizer and introduce SwanLab as Visual Backend
visualizer = Visualizer(
    vis_backends=swanlab_vis_backend
)

# Build mmengine's Runner
runner = Runner(
    model,
    work_dir='runs/gan/',
    train_dataloader=train_dataloader,
    train_cfg=train_cfg,
    optim_wrapper=opt_wrapper_dict,
    visualizer=visualizer,
)

# Start training
runner.train()
If you want to specify experiment names and other information as you would normally use SwanLab, you can specify parameters in init_kwargs when instantiating SwanlabVisBackend. Refer to init api for details. However, unlike directly passing parameters as arguments using swanlab.init, you need to construct a dictionary.
Here are the differences in interaction:
Directly using swanlab.init:
run = swanlab.init(
    project="cat-dog-classification",
    experiment_name="Resnet50",
    description="My first AI experiment",
)
Using SwanlabVisBackend, pass the parameters in the form of a dictionary:
swanlab_vis_backend = SwanlabVisBackend(
    init_kwargs={
        "project": "cat-dog-classification",
        "experiment_name": "Resnet50",
        "description": "My first AI experiment",
    }
)
Method 2: Introduce SwanlabVisBackend in the Config File
INFO
This method is applicable to most training frameworks based on MMEngine.
Add the following content to any config file of the MM series framework, where the dictionary of parameters in init_kwargs follows the rules of swanlab.init:
# swanlab visualizer
custom_imports = dict(  # Import SwanLab as a logger, for projects that do not support custom_imports, directly initialize SwanlabVisBackend and add it to vis_backends
    imports=["swanlab.integration.mmengine"], allow_failed_imports=False
)

vis_backends = [
    dict(
        type="SwanlabVisBackend",
        init_kwargs={  # swanlab.init parameters
            "project": "swanlab-mmengine",
            "experiment_name": "Your exp",  # Experiment name
            "description": "Note whatever you want",  # Description of the experiment
        },
    ),
]

visualizer = dict(
    type="Visualizer",
    vis_backends=vis_backends,
    name="visualizer",
)
You can test whether the config file can successfully introduce SwanLab using the following code. Save the above config file as my_swanlab_config.py, create a test_config.py with the following code, and run it:
from mmengine.config import Config
import mmengine

print(mmengine.__version__)
cfg = Config.fromfile(
    "my_swanlab_config.py"
)

from mmengine.registry import VISUALIZERS

custom_vis = VISUALIZERS.build(cfg.visualizer)
print(custom_vis)
If you see information similar to the following printed in the terminal, it means SwanLab has been successfully introduced:
MMEngine Version: 0.10.4
SwanLab Version: 0.3.11
<mmengine.visualization.visualizer.Visualizer object at 0x7f7cf15b1e20>
Example 3: Training ResNet-50 with MMEngine
Refer to the MMEngine Official 15-minute Tutorial
Install MMEngine following the MMEngine official tutorial.
Here is the command to install the environment. It is strongly recommended to follow the official documentation to install it. Taking Python 3.11 and CUDA 12.1 as an example:
# with cuda12.1 or you can find the torch version you want at pytorch.org
pip install torch torchvision --index-url https://download.pytorch.org/whl/cu121
pip install -U openmim
mim install mmengine
pip install swanlab
Use the following code to build the ResNet-50 network and introduce the Cifar10 dataset to start training:
import torch.nn.functional as F
import torchvision
import torchvision.transforms as transforms
from torch.optim import SGD
from torch.utils.data import DataLoader

from mmengine.evaluator import BaseMetric
from mmengine.model import BaseModel
from mmengine.runner import Runner
from mmengine.visualization import Visualizer

from swanlab.integration.mmengine import SwanlabVisBackend


class MMResNet50(BaseModel):
    def __init__(self):
        super().__init__()
        self.resnet = torchvision.models.resnet50()

    def forward(self, imgs, labels, mode):
        x = self.resnet(imgs)
        if mode == "loss":
            return {"loss": F.cross_entropy(x, labels)}
        elif mode == "predict":
            return x, labels


class Accuracy(BaseMetric):
    def process(self, data_batch, data_samples):
        score, gt = data_samples
        self.results.append(
            {
                "batch_size": len(gt),
                "correct": (score.argmax(dim=1) == gt).sum().cpu(),
            }
        )

    def compute_metrics(self, results):
        total_correct = sum(item["correct"] for item in results)
        total_size = sum(item["batch_size"] for item in results)
        return dict(accuracy=100 * total_correct / total_size)


norm_cfg = dict(mean=[0.491, 0.482, 0.447], std=[0.202, 0.199, 0.201])
train_dataloader = DataLoader(
    batch_size=32,
    shuffle=True,
    dataset=torchvision.datasets.CIFAR10(
        "data/cifar10",
        train=True,
        download=True,
        transform=transforms.Compose(
            [
                transforms.RandomCrop(32, padding=4),
                transforms.RandomHorizontalFlip(),
                transforms.ToTensor(),
                transforms.Normalize(**norm_cfg),
            ]
        ),
    ),
)

val_dataloader = DataLoader(
    batch_size=32,
    shuffle=False,
    dataset=torchvision.datasets.CIFAR10(
        "data/cifar10",
        train=False,
        download=True,
        transform=transforms.Compose(
            [transforms.ToTensor(), transforms.Normalize(**norm_cfg)]
        ),
    ),
)

visualizer = Visualizer(
    vis_backends=SwanlabVisBackend(init_kwargs={})
)  # init args can be found in https://docs.swanlab.cn/zh/guide_cloud/integration/integration-mmengine.html

runner = Runner(
    model=MMResNet50(),
    work_dir="./work_dir",
    train_dataloader=train_dataloader,
    optim_wrapper=dict(optimizer=dict(type=SGD, lr=0.001, momentum=0.9)),
    train_cfg=dict(by_epoch=True, max_epochs=5, val_interval=1),
    val_dataloader=val_dataloader,
    val_cfg=dict(),
    val_evaluator=dict(type=Accuracy),
    visualizer=visualizer,
)
runner.train()
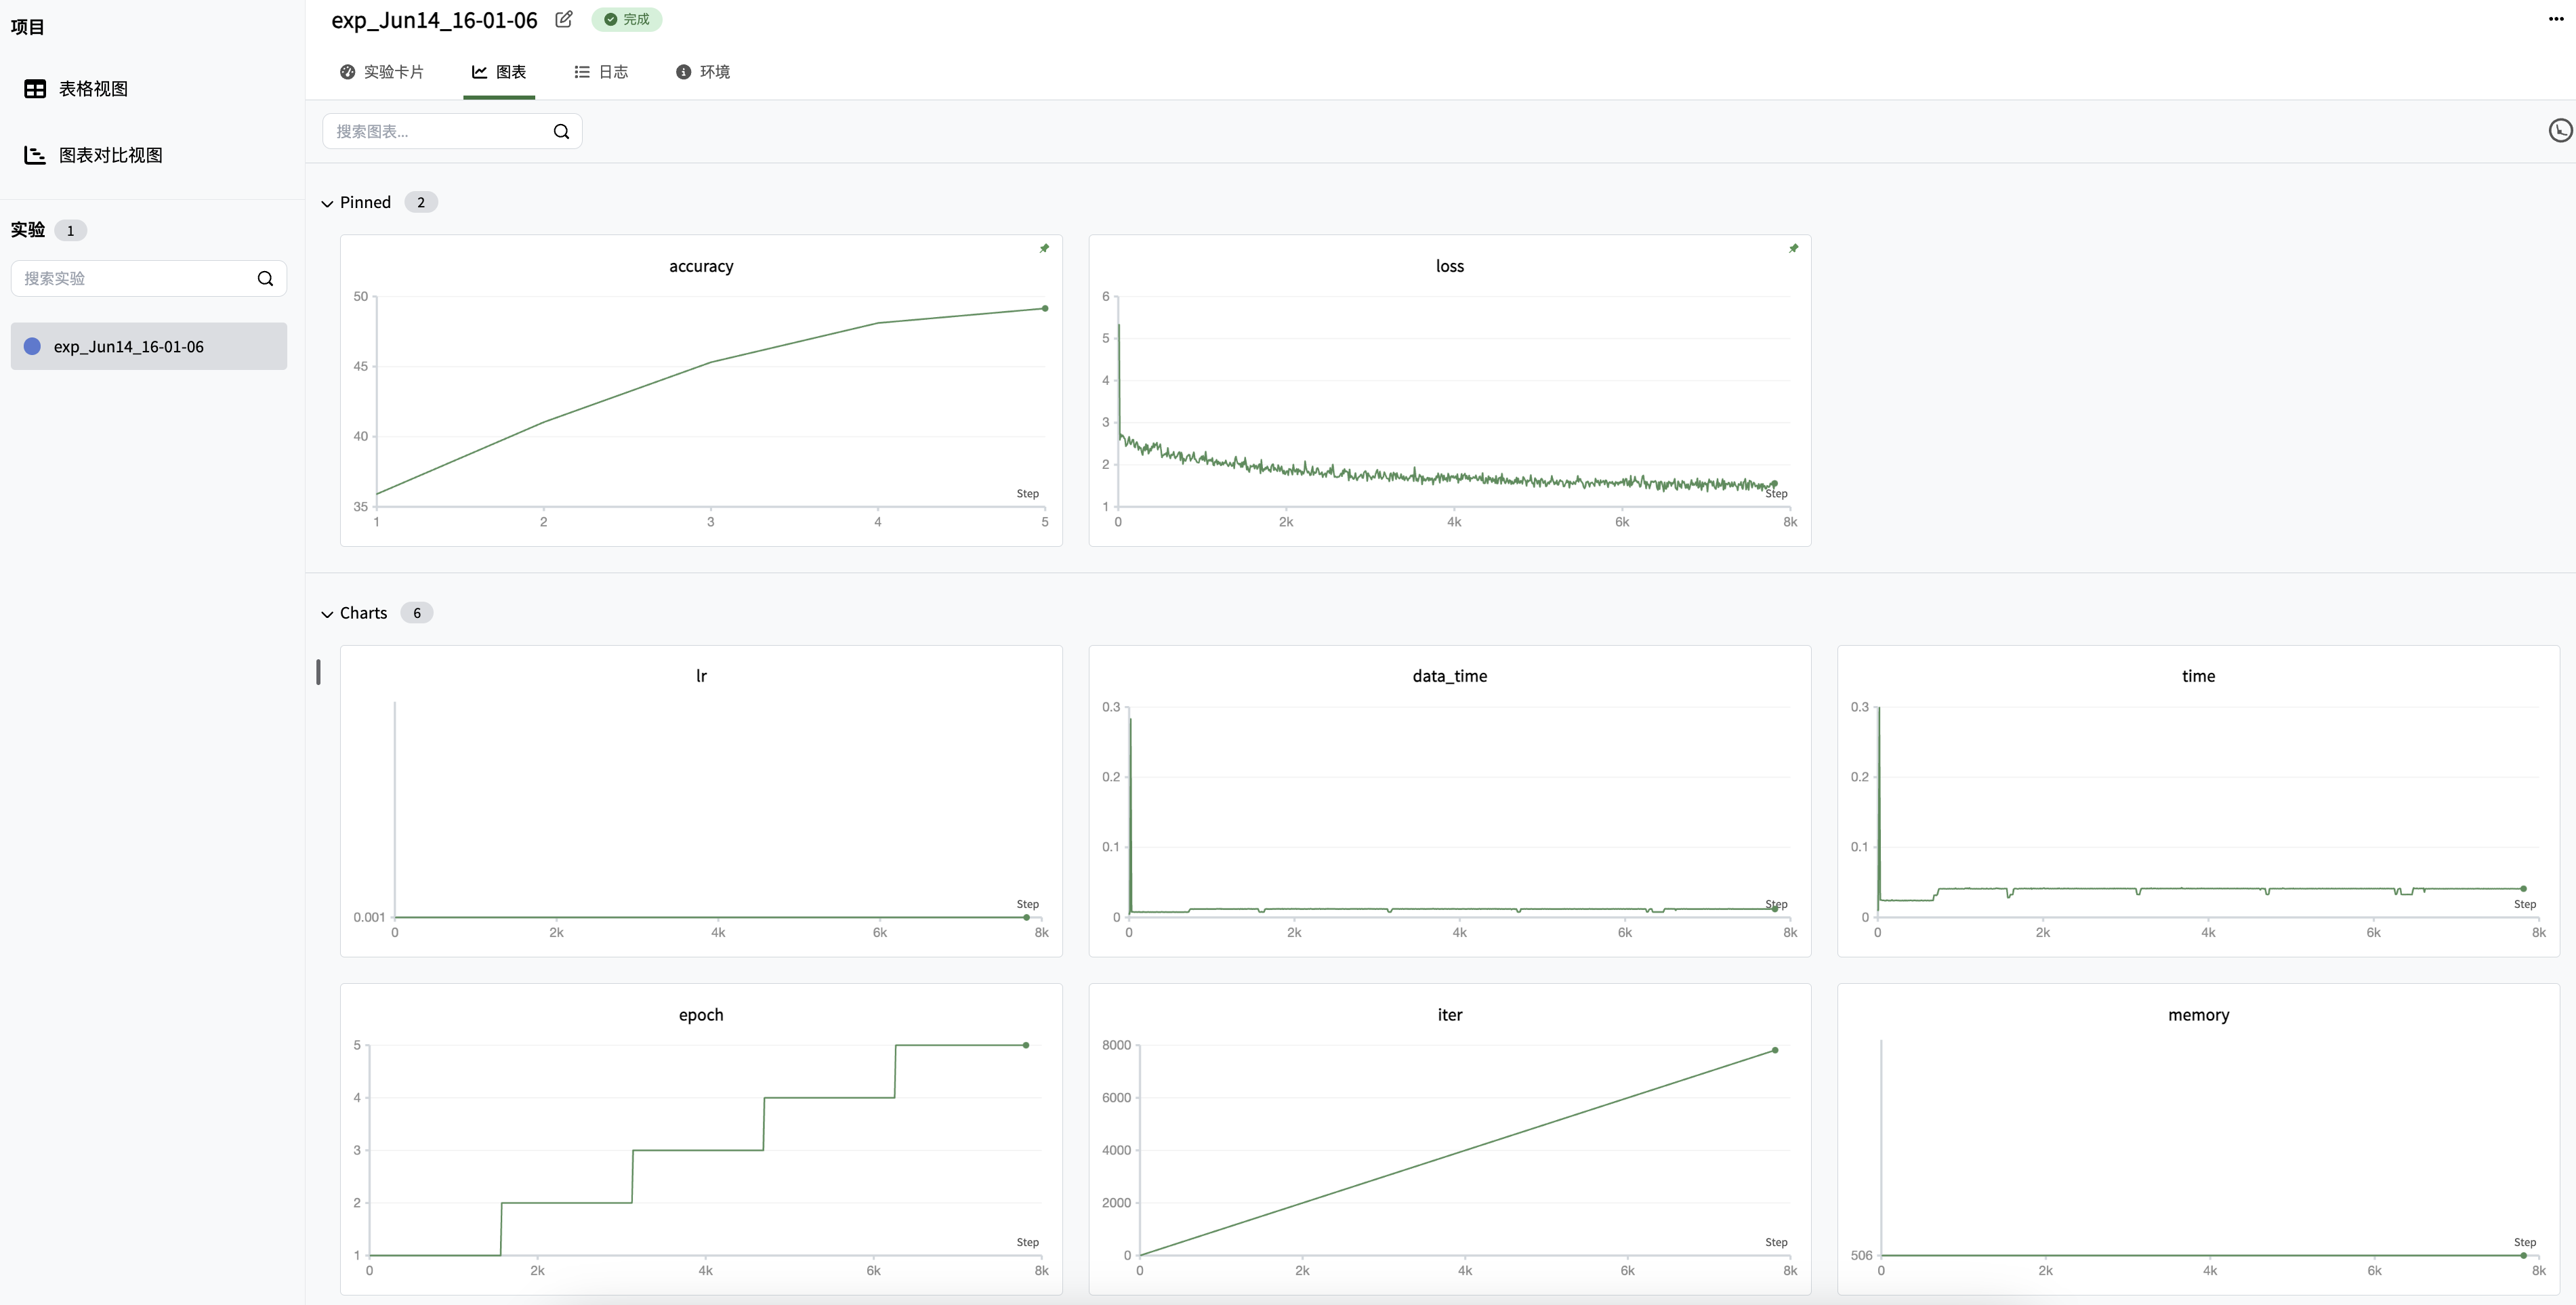
You can view the training results of the above script in public training charts.
